Aloe Vera: Care and Practical Uses
Aloe vera is one of the most rewarding succulents to keep indoors, rewarding bright light and lean watering with plump leaves and useful gel. This guide covers soil, watering, harvesting and propagation in practical detail.
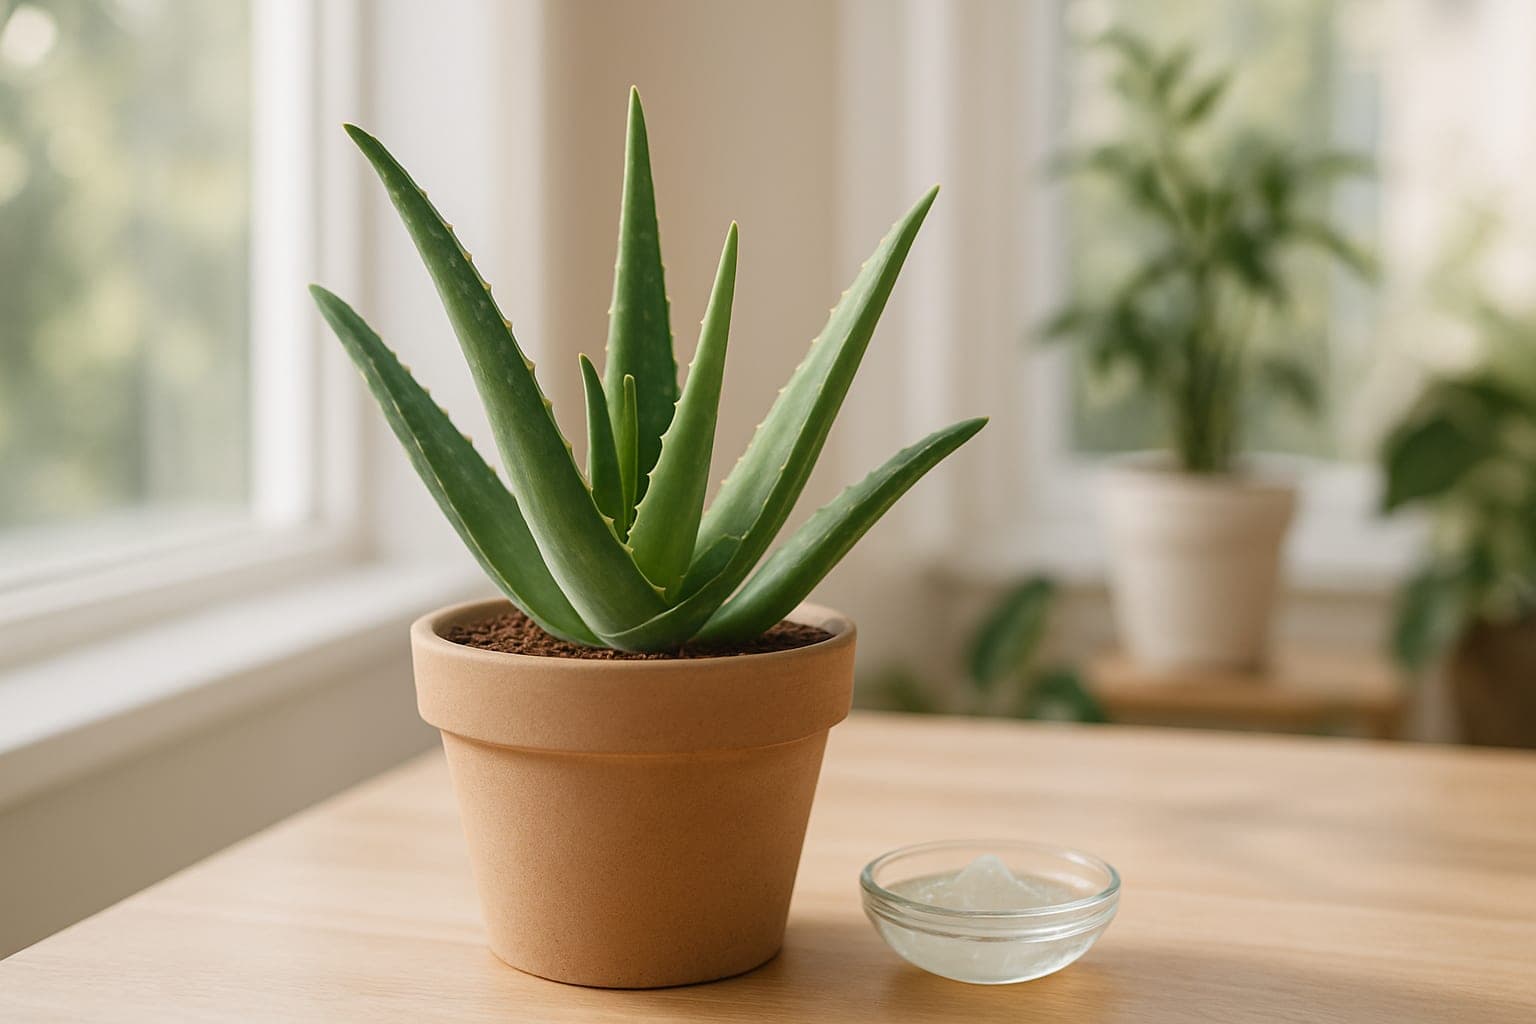
Aloe vera is a forgiving succulent that thrives on a little neglect. Give it strong light, gritty soil and infrequent but thorough watering, and it will reward you with thick, gel-filled leaves and a steady supply of offsets. The most common mistakes are overwatering, low light and burying it in dense compost, all of which are easy to put right.
Light
Aloe vera wants as much bright light as you can give it. A south- or west-facing windowsill is ideal indoors, and an east-facing window will keep it healthy if a little slower. The leaves should sit firm, fat and a fresh greyish-green. Tell-tale signs of poor light are pale, floppy leaves that lean dramatically towards the window, long gaps between leaves and a plant that splays open rather than holding its rosette shape.
If you want to move it outside in summer, do so gradually. Aloes that have been kept indoors can scorch badly when suddenly exposed to direct outdoor sun. Acclimatise over a week or two, starting in a shaded spot and stepping up the light each day. Watch for bronzing or reddish tints on the leaves — a little colour is fine and indicates strong light, but deep red or papery patches mean it has gone too far.
Soil and Potting
The single biggest favour you can do an aloe is to plant it in fast-draining, gritty soil. A standard houseplant compost holds far too much water around the roots.
A simple mix
- Two parts cactus and succulent compost (or peat-free multipurpose)
- One part horticultural grit or coarse sand
- One part perlite or pumice
Use a pot with drainage holes — terracotta is excellent because it wicks moisture away from the rootball. Choose a pot only slightly larger than the rootball; aloes dislike sitting in a large volume of damp soil. Repot every two to three years, or when offsets have filled the pot and the plant becomes top-heavy.
Watering
Follow a strict soak-and-dry approach. Water thoroughly so it runs out of the drainage holes, then leave the soil to dry out completely before watering again. Check by pushing a finger an inch or two into the compost: if you feel any moisture, wait.
Rough seasonal rhythm
- Spring and summer: typically every 2–3 weeks, depending on warmth and light.
- Autumn and winter: roughly once a month, sometimes less if the plant is cool and dim.
Always tip away any water that collects in the saucer. Aloes hate wet feet more than they hate drought.
Reading the leaves
- Underwatered: leaves curl inwards, thin out, wrinkle along their length and may take on a dull, dusty appearance. A good soak usually plumps them back up within a few days.
- Overwatered: leaves turn soft, translucent, yellow or brown from the base upwards. The plant may become mushy at the crown — this is serious and often fatal if not caught early.
If you suspect rot, unpot the plant, cut away any soft brown tissue with a clean blade, let the wounds callus for a couple of days and repot into fresh dry mix.
Temperature and Humidity
Aloe vera is happy in normal room temperatures, somewhere between around 13°C and 27°C. Keep it away from cold draughts and unheated windowsills in winter, where the glass can become very cold at night. It does not need misting or any added humidity — average indoor air suits it perfectly.
Feeding
Aloes are light feeders. A diluted cactus or succulent fertiliser applied once a month during spring and summer is plenty. Do not feed in autumn or winter, and never feed a stressed, recently repotted or rotting plant.
Propagation from Pups
A healthy aloe will produce offsets, often called pups, around the base of the mother plant. These are the easiest way to make more aloes.
- Wait until the pup has at least three or four leaves of its own and ideally some visible roots.
- Unpot the mother plant and gently tease the pup away, or slice it free with a clean knife where it joins the parent.
- Leave the cut surface to callus over in a dry, shaded spot for two to three days.
- Pot into the same gritty mix and leave dry for about a week before the first light watering.
Leaf cuttings rarely succeed with aloe vera — stick to pups for reliable results.
Harvesting and Using the Gel
The clear gel inside the leaves is traditionally used to soothe minor skin irritations such as small burns, sunburn and dry patches. Only harvest from a mature, well-established plant with plenty of thick outer leaves.
- Choose an outer leaf, the lowest and largest, and slice it cleanly at the base.
- Stand the cut leaf upright for ten to fifteen minutes to drain the yellow latex (aloin), which can irritate skin and should not be ingested.
- Lay the leaf flat, trim the spiny edges, then slice off the top skin to expose the gel.
- Scoop the gel out with a spoon and use immediately, or store in a sealed container in the fridge for a few days.
Always patch-test on a small area of skin first, and avoid using gel from supermarket aloes that may have been treated. Do not consume homemade aloe preparations.
Common Problems at a Glance
- Soft, mushy base: overwatering or rot — unpot and inspect roots.
- Brown leaf tips: usually underwatering or sunburn after a sudden move.
- Leggy, pale plant: insufficient light — move closer to a bright window.
- Pests: mealybugs occasionally appear in leaf joints; dab with a cotton bud dipped in isopropyl alcohol.
Final Thoughts
Aloe vera asks for very little: strong light, gritty soil, a deep drink only when bone dry, and a quiet winter. Get those right and you will have a sculptural, useful plant that produces pups for friends and gel for the occasional kitchen mishap for many years.
Tools and supplies for this
Products we'd actually buy for this job. Linking to Amazon — if you buy through these links we earn a small commission at no extra cost to you.
- Weston Mill Terracotta Pots, 15.5cm (pack of 10)
Honest British terracotta — breathable walls let roots dry between waterings, ideal for anything prone to rot.
- Weston Mill Pottery Terracotta plant pots, 175mm (pack of 10)
Mid-size workhorse terracotta — perfect step-up for plants outgrowing their nursery pots.
- Weston Mill Pottery Terracotta plant pots, 20cm (pack of 5)
Heavyweight 20cm clay for established plants — the porous walls help prevent the soggy roots aroids hate.
- Whitefurze G04012 7.5cm Garden Pot - Terracotta (Set of 10)
Cheap, cheerful plastic propagation pots — what we actually use for cuttings and small offsets.
BotanicBuddy Editorial Team
Plant Care Team
Passionate about helping plant parents succeed with expert tips and proven techniques.
Related Articles
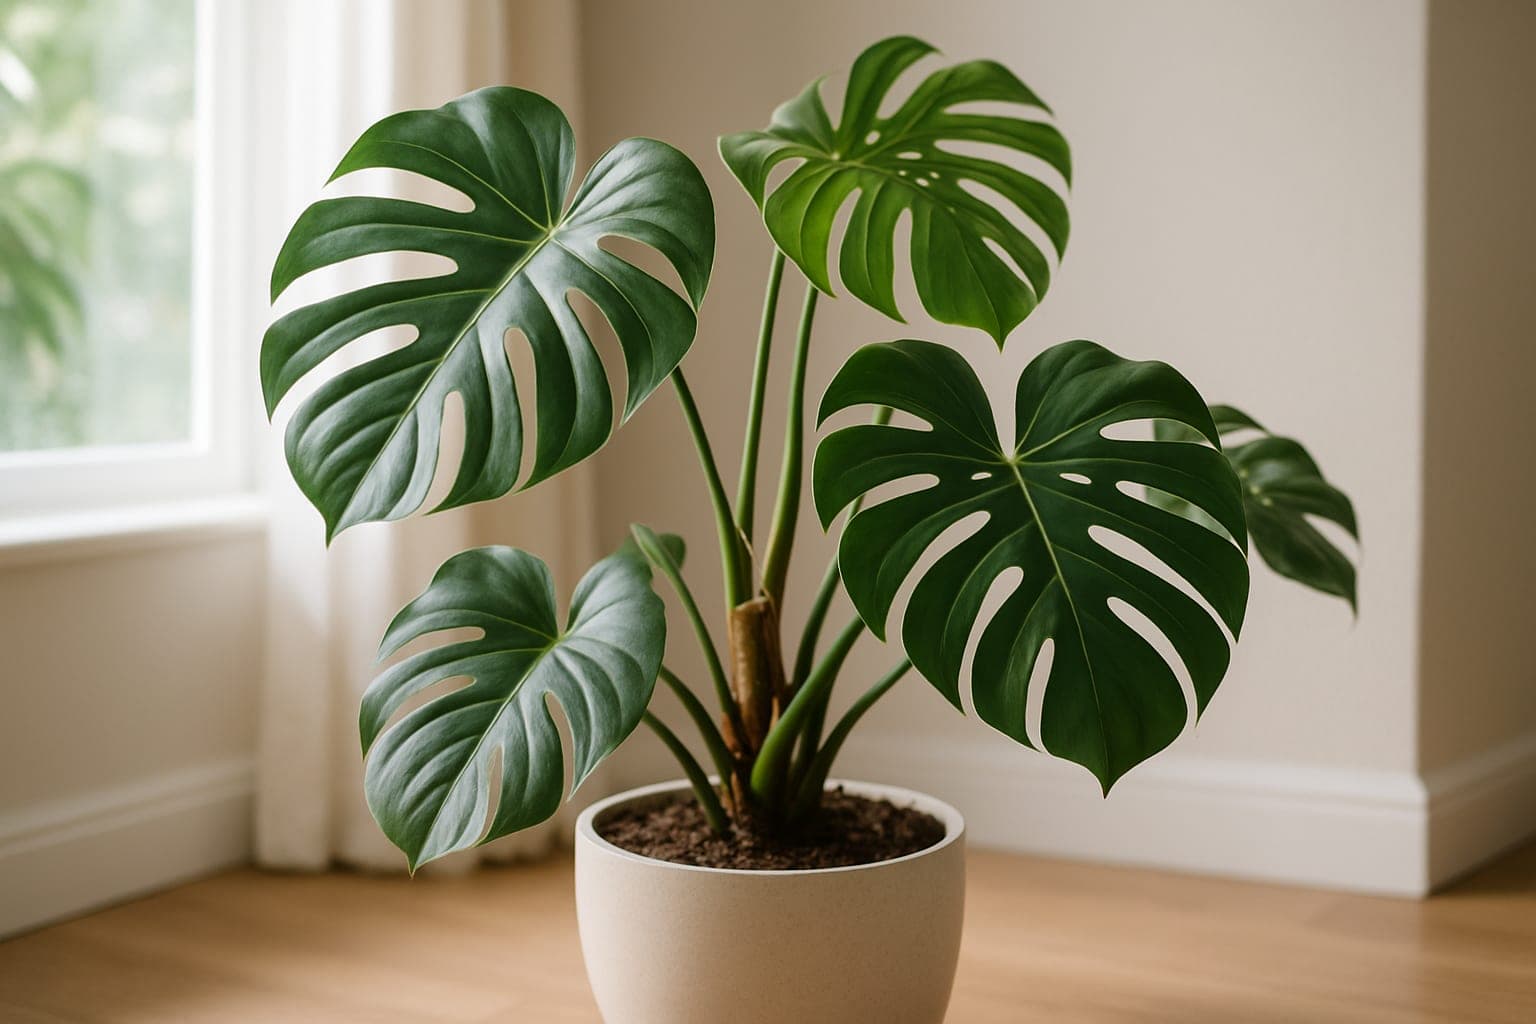
Monstera Deliciosa Care Guide
The Monstera deliciosa, or Swiss cheese plant, is a rewarding tropical climber prized for its dramatic split leaves. This guide covers everything from light and watering to moss poles and the secrets behind those iconic fenestrations.
Seasonal Plant Care: Adjusting for the Changing Year
Adapt your plant care routine throughout the year to keep your houseplants healthy and thriving.

Comments(526)
I've learned the hard way that aloe really does prefer neglect over fussing—I nearly killed mine with kindness by watering too often until I switched to a gritty, well-draining mix and backed off completely. Now I barely water mine during the dry season, and the leaves are so plump and full of gel that I actually use it. Great to see the practical focus here.
I totally relate—I drowned my first aloe in my cold apartment by watering on a schedule like it was a tropical plant! Switching to a grittier mix made all the difference for me too. Have you found that the dry season neglect works year-round where you are, or do you adjust at all when it gets warmer? I'm curious if you've had better gel quality once you dialed in the watering, since mine took a few months to really plump back up after I backed off.
I totally relate—I've gone through that cycle too! It's funny how succulents punish you for caring, isn't it? Since you've got yours thriving now, I'm curious: do you harvest from the outer leaves, or do you have a particular method that works best for your setup? I've been experimenting with *Aloe barbadensis* gel for minor burns, and I'm always trying to dial in the timing so the leaves are at peak thickness without stressing the plant.
I've kept aloe for years and totally agree about the lean watering—I used to overwater mine until the leaves got mushy. The one thing I'd add is that if you're in a cooler climate like mine, giving it a proper winter dormancy (less water, cooler spot) really makes a difference in leaf plumpness come spring. Have you found that dormancy affects the gel quality at all?
I haven't deliberately tested gel quality after dormancy, but I've definitely noticed my aloe bounces back plumper in spring when I actually let it rest through winter—which in my arid climate just means moving it away from the heater and cutting back water even more than usual. Your point about cooler temps making a real difference resonates; I'd love to see a photo of your aloe's spring leaves next to a summer pic to compare!
I've been growing a single aloe vera for about six months now, and I'm still figuring out the watering schedule—I think I was overwatering at first because the leaves started getting translucent. Once I backed off and let the soil dry out completely between waterings, it bounced back pretty quickly. I'm really keen to try harvesting some gel soon, so I'm looking forward to seeing your propagation tips!
Oh, that translucent leaf situation is so relatable—I did the same thing with one of my aloes and felt terrible about it! The good news is they're surprisingly forgiving once you dial in that "basically neglect it" watering rhythm. I'm at thirteen succulents now and honestly treat my aloe like I forget it exists, and it's the happiest one in the bunch. You'll definitely have plenty of gel to harvest once it gets a bit chunkier!
I've learned the hard way that aloe really does prefer neglect over fussing—I killed my first one by watering too often, but once I switched to a gritty cactus soil and backed off completely, it thrived. The gel from a mature plant is genuinely useful too, so it feels good growing something that actually pays you back beyond just looking nice.
I'm so glad you figured out the watering thing—I've absolutely been there, watching a perfectly good aloe rot from kindness. The gritty soil really does make all the difference; I've found that even in my mediterranean climate where things dry out fast, standard potting mix holds too much moisture around the roots. And yes, there's something genuinely satisfying about harvesting that gel and actually *using* it instead of just admiring the plant!
I totally relate—I murdered my first aloe the same way! What's been a game-changer for me is treating the watering schedule seasonally; even in my Mediterranean climate, winter basically means I forget it exists for two months. Do you harvest the outer leaves as they mature, or do you wait until the plant is quite substantial before taking gel?
I've got an aloe that's been sitting in my collection for a few months now, and I'm finally getting somewhere with it after watering way too much at first. My question is about the gel harvesting—do you need to wait until the plant reaches a certain size before you can actually take leaves without stunting it, or can you start harvesting once it's established? I'd love to use mine for something practical instead of just looking at it.
I've got nine plants at home and mostly orchids, so succulents aren't really my thing yet—the cold winters here make them trickier—but I'm curious about the gel extraction you mention. Do you find that harvesting affects the plant's growth much, or does *Aloe barbadensis* bounce back quickly? I have a small one that's been doing okay on a bright windowsill, though I'd love to see a photo of what mature leaves should look like before I try anything.
I really appreciate the practical focus here—aloe gets a lot of hype but people often miss that *Aloe barbadensis* needs that lean approach you emphasize, especially indoors where air circulation is typically weaker. The gel production genuinely does seem to improve when you resist the urge to fuss, which feels counterintuitive to most new growers. I've found propagating from pups gives faster, fuller plants than leaf cuttings, though I'm curious what your experience has been with those two methods.
I've killed more aloe plants than I care to admit by watering them like they actually wanted my affection, so I appreciate you emphasizing the lean-watering approach—that's really where most people slip up. I'm curious whether you've found any difference in gel quality between plants grown in bright indirect versus direct sun, since I've got mine in a south-facing spot and sometimes wonder if I'm overdoing it.
I feel that in my bones—I've definitely had the "loving it to death" phase! My aloe in the south-facing window actually seems happier than the one I tucked in bright indirect light, though I think it's more about the overall drainage than the sun intensity. The one in direct sun gets hotter and dries out faster, which honestly keeps me from overwatering by accident, and the gel feels just as thick and useful either way. If anything, I'd say your south-facing spot is probably fine as long as the soil dries quickly between waterings!
I've had *Aloe barbadensis* in my collection for years now, and the difference between keeping it on a bright shelf versus a shadier spot is honestly night and day—the leaves stay lean and translucent when light is low, but they plump up beautifully near a south-facing window. Your point about lean watering is spot-on; I learned that lesson the hard way when I nearly lost one by treating it like my tropical aroids. Great to see a guide that emphasizes the practical side of harvesting too.
I appreciate the practical focus here, though I'd gently push back on "rewarding" being the main draw—aloe is honestly forgiving to the point of neglect, which is exactly why it works. The gel harvest angle is interesting, but I've found the real limiting factor isn't care technique; it's light. Mine sulks visibly without bright, direct sun (I keep mine by a south-facing window), and that's where most people run into trouble, not the watering part.
I've got three aloe plants scattered around my place, and honestly they've been my easiest wins—though I did kill my first one by watering it like it was a regular houseplant! Now I just let the soil dry out completely between waterings, which feels counterintuitive but works great. Are you recommending any particular soil mix, or just standard cactus soil? I've been curious whether the gel quality changes depending on how much light they get since mine on the sunny kitchen windowsill always look more vibrant than the one in my bedroom.
I appreciate the practical focus here, though I have to admit aloe isn't really in my wheelhouse—I'm much more of an orchid person, especially since I'm out in the arid southwest. That said, I've always been struck by how forgiving *Aloe barbadensis* is compared to most of what I grow; the lean watering advice is spot-on, since overwatering is really where people stumble. Have you found any particular soil amendments work especially well for keeping the drainage sharp without the plant drying out between waterings?
I've been experimenting with this too! I killed my first aloe by keeping it too wet, so now I'm using a gritty mix—mostly potting soil with added perlite and coarse sand. It drains really fast, which scared me at first, but the leaves actually seem plumper than before, so I think the roots are happier. Do you find orchids need something totally different, or is that same "fast drainage" principle working for you in the southwest?
I've been meaning to try aloe vera—I have nine herbs going at the moment and they're definitely keeping me humble! My question is whether aloe needs the same kind of gritty, well-draining soil as my rosemary, or if it's even pickier about drainage? I tend to overwater everything out of guilt, so I'm hoping the "lean watering" approach might actually play to my weaknesses for once.
I totally relate to the overwatering guilt—I've definitely been there. From what I've read, aloe actually does want that gritty, well-draining soil like your rosemary, but honestly the bigger win is that it's way more forgiving if you *under*water it than if you're too generous. Since you know you tend to overwater, aloe might be that plant that finally lets you succeed by doing less. Have you found any tricks that help you remember to hold back on watering?
I've kept aloe vera (Aloe barbadensis) for years and learned the hard way that "lean watering" really means it—I killed my first one by fussing over it too much. The gel is genuinely useful for minor burns, but I'm curious whether you find the leaves stay plump enough for regular harvesting in a cold climate, or do you mostly let them build up before taking cuttings?
I've been trying to keep aloe happy in my cold climate apartment and it's been... humbling! My biggest win so far was realizing it actually *prefers* to dry out completely between waterings—I was convinced I was being neglectful, but it turns out that's exactly what it wants. Looking forward to learning the harvesting part; I've got a few mature leaves but I've been too nervous to actually use the gel in case I kill the plant somehow.
I totally get the nervousness—I've definitely killed plants while *trying* to use them! But here's the thing with Aloe barbadensis: harvesting actually stimulates better branching, so taking a few outer leaves won't hurt it at all. The plant wants you to use it. That said, in my arid climate I've found aloe appreciates even less water than most succulents once it's established, so your instinct about drying out completely is spot on.
I've got a soft spot for *Aloe barbadensis* even though it's technically not an herb—though the gel does feel like cheating when you need something practical from your plants! My question is about the soil mix you're recommending; I've always added extra perlite to mine in a temperate climate since drainage seemed to be the real make-or-break factor. Did you find a particular ratio worked best, or does it depend more on how often someone tends to water?
I've got to admit, aloe has been the one succulent that actually *thrives* despite my arid climate—which is saying something coming from someone who somehow managed to kill a jade plant once. The gel harvesting tip is gold; I wish I'd known earlier that you can take outer leaves without waiting for the whole plant to mature. My one orchid definitely doesn't appreciate the same sparse watering approach, so I appreciate posts like this that remind me different succulents have genuinely different needs. Bookmarking for reference!
I've killed aloe twice before finally getting it right—turns out my arid climate was actually the problem, not the solution. Switched to watering every two weeks during the growing season instead of once a month, and the difference was immediate. The gel-filled leaves you mention really do depend on consistent moisture, even if aloe tolerates drought. Definitely looking forward to the harvesting section since I'm finally at that stage with my current plant.
I've got three aloe plants in my collection and the biggest lesson I learned was stopping myself from overwatering—they genuinely thrive on neglect once established. The gel harvest tip is solid; I actually use mine for minor burns and dry patches rather than letting it sit unused. Would love to see your soil mix recommendation since that's where most people trip up with these.
I've got five Aloe barbadensis going right now and the biggest difference I've noticed is drainage—mine thrive in a 50/50 cactus mix and perlite blend, way grittier than most people use. The gel harvest is satisfying, but I'm curious whether you're recommending leaf removal from the base or top harvesting, since I've found basal leaves store more actual gel and regrow faster.
That drainage ratio is spot on—I do the same with mine in my Mediterranean setup and they absolutely love it. I tend to harvest from the base too, you're right that those outer leaves are more mature and gel-rich, plus it keeps the plant looking neat as new growth fills in from the center. Do you find your barbadensis recovers noticeably faster than if you were just snipping the tips?
I've got an aloe that's been struggling with mushy leaves, so I'm keen to dial in the watering—I think I've been overdoing it. Does the soil mix you recommend work well in Mediterranean heat, or do I need to adjust for our dry summers? I'd love to see a photo of yours if you've got one at different growth stages.
Mushy leaves almost always mean too much water—once you dial that back, recovery's usually quick. For Mediterranean heat, the standard cactus mix works fine, but I actually add extra perlite since our summers dry things out so fast; it prevents the soil from staying damp even a day longer than it should. The real trick is watering less frequently in summer, not adjusting the mix itself. Have you checked if your pot has drainage holes?
I'd push back gently on "rewarding" being the default—aloe really *demands* bright light and dry conditions, and I've seen plenty of people kill them with kindness via overwatering. That said, once you stop treating them like regular houseplants and accept they want neglect, they're genuinely reliable. My one aloe has thrived in a bright corner for years with minimal fuss, which is more than I can say for some of my orchids.
I've been wanting to get aloe vera right for months—mine keeps getting a bit mushy even though I thought I was underwatering it. Does the soil recommendation in your guide suggest adding extra perlite or sand, or is regular succulent soil usually fine? I'm really interested in the harvesting part too since I've never actually used the gel before!
I've had the mushy leaf problem too—turned out my soil was holding too much moisture even though I thought I was watering less. I switched to mixing extra perlite into regular succulent soil and it made a huge difference. Honestly, the gel harvesting is pretty straightforward once the plant's healthy; I'd love to see a photo of yours to check if it's a soil issue or something else. Are you using a pot with drainage holes?
I'd push back slightly on "rewarding bright light"—mine thrives on a south-facing shelf but actually sulks and gets thin when it's in the brightest spot year-round, especially in summer heat here. I've had better results treating it more like a low-demand plant that prefers bright but indirect light and honestly doesn't care much about anything else. Did you find aloe responds differently in your climate, or is that mostly a matter of individual plant variation?
I've killed exactly two aloe plants through overwatering before I learned that "lean watering" really means *lean*—especially in my dry Arizona climate where I somehow still managed it! My current trio is thriving now that I've stopped fussing, and I keep one right by my kitchen window for burns and dry patches. Great reminder that sometimes the most practical plants are the easiest ones if you just let them be neglected a little.
I kept killing my aloe in a cold apartment until I realized it was sitting too close to a drafty window—turns out these desert plants really hate the cold. Now I keep mine on a shelf away from winter air, and it's finally thriving. Did you find that light matters more than people think, or is consistent warmth the bigger factor for your readers?
Oh, this is so helpful to know! I've got my aloe in a warm spot now after reading your tip, but I'm curious—does that mean I should be even more cautious about watering in winter when it's away from drafts? I've always worried about overwatering, and I'm still figuring out the rhythm with my nine plants, mostly herbs that are way thirstier than this guy.
I appreciate the practical angle here—though I'll admit aloe isn't my go-to (I'm more herbs-focused), I've found the one thing that trips people up is that "lean watering" part. I used to underwater mine thinking succulents wanted zero attention, but they actually do better with a good soak and then a proper dry-out between waterings rather than just neglect. Have you found that's where most people struggle with theirs, or is it more the lighting side of things?
I've kept aloe for years in my tropical climate, and honestly the biggest shift for me was accepting it actually *prefers* neglect—especially humidity-wise. My plants did far better once I stopped treating them like the rest of my collection and moved them to the driest corner I had. If you're in the tropics like me, that lean watering advice is non-negotiable or they'll rot.
I've killed more aloe plants than I'd like to admit by overthinking the watering, so I'm glad you emphasized that lean approach—it really is the key. Mine finally thrived once I moved it to a south-facing window and basically forgot about it for weeks at a time. The gel itself is such a bonus when you actually have a healthy plant producing it.
I've had two Aloe barbadensis plants for years now, and the biggest thing that changed my results was ditching standard potting mix for a gritty blend—I use about 60% perlite and coarse sand with 40% cactus soil. The difference in how quickly the soil dries out prevents the root rot that usually kills these. Lean watering really does mean lean; I only water when the leaves start to look slightly deflated, which in temperate winters can be six weeks between drinks.
I really appreciate the focus on lean watering—so many people overthink aloe care and end up with rot. That said, I've found that soil composition matters just as much as watering frequency in my collection. I use a gritty cactus mix amended with extra perlite, and it's made all the difference in keeping *Aloe barbadensis* (and the trickier species like *Aloe haworthioides*) healthy indoors. Worth emphasizing that "well-draining" can mean different things depending on your climate and pot choice.
I've had an aloe for years now, and honestly the biggest breakthrough for me was finally accepting that "lean watering" really means *lean*—I killed my first one by fussing over it too much. Now I let mine dry out completely between waterings, and the leaves are so much plumper and more useful for actual gel harvesting. Great breakdown of the practical stuff here!
I've kept aloe for years now and totally agree on the lean watering—it's honestly the easiest way to kill them, which sounds backwards! One thing I'd add from my own experience: I've had much better luck with a gritty potting mix (I mix in perlite and coarse sand) than standard cactus soil alone, especially in temperate climates where it's more humid. Have you found certain soil ratios work better than others, or does it depend more on local conditions?
I've kept aloe for years alongside my orchids—totally different animals, which is the point. The one thing I'd push back on slightly is how forgiving aloe actually is in cold climates. Mine sulks below 50°F and gets mushy if I'm not ruthless about watering in winter. The gel extraction advice is solid though; I harvest from my oldest plant and it bounces back fine. Would've loved to see more on that dormancy period since that's where most people accidentally kill theirs.
I've had great luck with aloe, though I'll admit it took me a while to stop overwatering mine—the "lean watering" approach is really the key. Mine lives in a terra cotta pot with fast-draining cactus mix, and I only water when the soil is completely dry, usually every 3–4 weeks even in my Mediterranean climate. Have you found that people struggle more with watering or light, in your experience?
I've killed two aloe veras by overwatering before I finally accepted they genuinely need *less* water than I thought—mine gets watered maybe once a month even in our warm season. The gel harvest tip is useful, but I'd add that waiting until the outer leaves are really fat and mature makes a difference in gel quantity. Have you found aloe propagates better from leaf cuttings or pups in your experience?
I totally relate to the overwatering struggle—I killed my first one that way too! Once a month sounds right for most conditions, though I've found mine actually needs even less in winter since I'm in a cold climate. Your point about waiting for mature outer leaves is spot on; I used to harvest too early and got disappointed with how little gel there was. For propagation, I've had way better luck with pups than leaf cuttings—they establish faster and I lose fewer to rot. Have you tried separating pups from the mother plant, or are you still mainly doing leaf propagation?
I've killed two aloe veras through pure kindness—overwatering them like they were needy tropicals instead of the drought-loving desert dwellers they actually are—so I'm bookmarking this for the soil and watering breakdown. My current one finally has plump leaves again after I moved it to a sunnier spot and basically ignored it, which feels very on-brand for my whole plant journey. Do you find that aloe propagates more reliably from pups or from leaf cuttings?
I've had great success with aloe in my collection despite my mediterranean climate being a bit humid for succulents. The key for me has been using a gritty, well-draining mix—I add extra perlite to standard cactus soil—and resisting the urge to water during cooler months. Have you found any particular soil amendment works best for keeping the leaves that plump, satisfying texture without encouraging rot?
I'd skip aloe if I lived somewhere cold—mine never thrived in my climate and I got tired of fighting it. That said, the soil advice here matters more than most people realize; I've seen too many fail because they're treating it like a regular houseplant instead of accepting it wants drainage over everything else. If you're in a warm zone, this guide nails the practical side.
I learned this the hard way after killing my first aloe with too much water, but the lean-and-mean approach really does work—mine's now one of my healthiest plants and I actually use the gel for minor burns around the kitchen. The propagation tip will be helpful since my plant has gotten so full I've been meaning to divide it up and share with friends.
I had the same experience with my first *Aloe barbadensis*—overwatering is genuinely the biggest hurdle. What's worked well for me is letting the soil dry completely between waterings and using a gritty mix with extra perlite, which made all the difference in my tropical setup where humidity tends to creep up. The propagation route is smart too; even small rosettes establish quickly if you let the cuts callus for a few days first.
I'm totally with you on the watering lesson—I drowned my first one too. Once I switched to the "basically neglect it" approach and let the soil dry out completely between waterings, everything changed. I've got a photo of mine right now that's honestly one of my six plants I'm proudest of, so thick the leaves are almost translucent. The propagation is dead simple; just let the pups sit out for a day after you separate them so the wounds callus over, then pot them up in cactus soil and barely water for the first few weeks.
I'm glad you've had such good success with the lean approach—it's such a relief when a plant bounces back! My own orchids have taught me that restraint with water is almost always the move in arid climates, and I bet your aloe appreciates that discipline just as much. Propagating from offsets is wonderfully straightforward too, so your friends are in for a treat.
I've always found aloe happier when I treat it almost with benign neglect—my most robust plant sits in a terra-cotta pot by an east-facing window, and I water it maybe once a month even in my hot Mediterranean summers. The one time I tried to be attentive with weekly watering, it got mushy within weeks, so I appreciate that you're emphasizing the lean watering approach. Curious if your propagation method involves waiting for pups to develop their own roots before separating, or if you've had success with direct potting?
I've had my aloe for about four years now and it's honestly one of my easiest plants—which is funny because I mostly grow tropicals that want way more fussing! My biggest win was finally switching to a grittier soil mix; it made such a difference in preventing the rot issues I used to have. Do you find that people tend to overwater these more than underwater, or is it pretty split? I'd love to know if you have tips for getting them to pup reliably, since mine seems pretty content to just stay as one big rosette.
I appreciate the focus on lean watering—that's where I've seen most people struggle with *Aloe barbadensis*. I killed my first one by overwatering in winter, which taught me to really let the soil dry out completely between waterings, especially in a cold climate like mine. The gel harvesting angle is what keeps me growing it though; I use it for minor burns and have found it genuinely useful. How do you handle propagation from pups in cooler conditions, or do you just wait until spring?
I've always found *Aloe barbadensis* a bit fussier than people expect, honestly—mine's finally thriving after I switched to a gritty cactus mix and basically forgot about watering it. Have you had better luck with propagation from offsets versus leaf cuttings? I'd love to see a photo of your mature plant if you have one, since the gel yield really seems to depend on how established the rosette gets.
I'm with you on the gritty mix making all the difference—I've found *Aloe barbadensis* really does prefer that drying cycle between waterings. For propagation, offsets are so much more reliable in my experience; leaf cuttings work but they're temperamental and take forever. The established rosettes definitely yield more gel, though I've noticed my older plants (I'm at about 15 in the collection now) need less frequent harvesting than people assume—once or twice a year is plenty to keep them producing without stressing them out.
I'm glad you mentioned the gritty mix—that's exactly what I switched to after my first one got soggy. I've only tried offset propagation so far and it's been pretty straightforward, but I'm curious about leaf cuttings since I have some leaves I could experiment with. My aloe is still pretty small (about a year in), so I'd love to see a photo of yours to know what I'm actually working toward—does it take long before the rosettes get big enough that you're actually harvesting gel regularly?
I've had decent success with *Aloe barbadensis* in my kitchen, though I'll admit it took me a while to stop overwatering—that's always been my downfall with succulents. The gel harvesting tip is something I wish I'd known sooner; mine's finally mature enough that I'm actually using it. Do you find the propagation success rate is better with leaf cuttings or pups in your experience? I'd love to expand my collection beyond the one plant I've got, but I'm curious what actually works reliably.
Honestly, pups are where it's at for me—I've had way better luck with those than leaf cuttings, which honestly feel like a gamble. My kitchen aloe's been throwing pups for a couple years now, and I just let them sit in dry soil for a week or two before watering, and they take off. Have you noticed yours starting to produce any baby plants yet, or is it still in the solo phase?
Pups are hands down more reliable for me—I've had maybe one leaf cutting actually take root in five attempts, whereas pups from the base almost always establish if you let them dry out first. I've got a photo of my mature plant with several pups coming in right now that I'd share if I could upload here. The key is really just patience with drying; I wait a full week before potting them up, then hold off watering for another couple weeks. Overwatering is brutal with these, but once you nail that rhythm it's pretty hard to kill them.
I'd push back a bit here—aloe vera is rewarding *if* you can give it genuinely bright light, and a lot of indoor spaces just don't cut it. I've found it gets leggy and weak in anything less than a south-facing window, which isn't realistic for everyone. That said, the gel harvesting part is spot-on; once established, it's genuinely useful and low-maintenance.
I've kept five plants for years now, mostly orchids in my cold climate, so succulents feel almost too easy by comparison—but that's exactly why aloe works where other houseplants fail. The lean watering advice is spot on; I see more aloe killed by kindness than neglect. Would've loved to see more detail on propagation timing though, since leaf cuttings need different conditions than offsets, and getting that wrong wastes material.
I really appreciate the practical angle here. I'd gently push back on the "indoors" framing though—in my experience, *Aloe barbadensis* thrives best with unfiltered outdoor light in arid climates. Even a bright south-facing window can leave them a bit stretched after a season or two. The gel quality seems noticeably better on plants that get intense sun, which tracks with their native habitat. Have you noticed differences depending on your growing conditions?
You're absolutely right about the light—my aloe on the south-facing sill has been getting progressively lankier, and I hadn't quite connected it to the gel quality issue until you mentioned that. I'm in a cold climate, so outdoor growing isn't really an option for me, but I'm thinking about moving mine closer to a grow light this winter to see if that helps. Have you found that propagating from a sun-stressed plant gives you pups that are naturally more compact, or does moving them to better light help them recover?
I've killed more aloe plants than I'd like to admit before realizing my problem was overwatering in winter—I kept thinking the leaves looked sad, but they were actually just thirsty for *light*, not water. Now I let mine go bone dry for weeks in my cold climate and they're finally thriving. Do you find that people mostly struggle with watering, or is it more the light situation where you live?
I've had great success with aloe in my drier climate, though I'll admit it's easy to overthink the watering—my first one rotted because I treated it like my orchids need constant attention. Your emphasis on lean watering really resonates with me. Since you cover propagation, I'm curious whether you've found leaf cuttings or offsets more reliable for getting new plants established quickly?
Ha, I love that orchid comparison—I definitely made that same mistake with my first aloe! The funny thing is, my Mediterranean climate should've made it obvious, but I was convinced everything needed fussing. Offsets are definitely more forgiving than leaf cuttings in my experience; they root faster and seem to bounce back from neglect better, which honestly suits my plant personality much better than the precision aloe leaves demand.
I killed my first aloe through pure kindness—watering it like I thought it needed love, which it definitely did not! Now I've got three thriving in a south-facing corner with barely any intervention, and honestly, it's been revelatory how much happier they are when I just leave them alone. The harvesting tip is gold too; I've started using my own gel for minor burns instead of buying tubes, which feels like a small win after all those early failures.
I've got an orchid that's been teaching me that less water is usually right, so I'm definitely going to try aloe—sounds like it'd be a good match for my temperate spot since I tend to underwater anyway. My only question is whether aloe needs the same kind of drainage setup as my other succulents, or is standard potting soil fine? I'd love to grab one soon if it's forgiving enough for someone still learning the basics.
I'm curious about the watering guidance—I keep mine in a fairly humid mediterranean climate and have found that even my "lean watering" approach sometimes leads to soft leaves if I'm not careful with drainage. Are you finding that the typical succulent advice holds up equally well indoors versus in warmer regions, or does humidity change the calculus? I'm still learning whether my Aloe barbadensis needs different treatment than it would in a drier climate.
I've kept *Aloe barbadensis* for years and the lean watering part really makes the difference—I was overwatering mine initially and got nowhere until I switched to watering only when the soil was bone dry and the leaves started to look slightly thin. The gel harvest tip is solid too; I've found it's worth waiting until the outer leaves are genuinely plump before you cut, otherwise you're just getting stringy disappointment.
I completely agree on the watering discipline—it's counterintuitive for people used to typical houseplants. I've had the same experience with mine; the temptation to "help" thin-looking leaves is almost irresistible, but you're absolutely right that patience pays off. What I've noticed is that once the plant trusts you with dry periods, it actually grows more vigorously, and those outer leaves fill out properly. Your point about waiting for plumpness before harvesting is spot on too.
That bone-dry soil advice is golden—I learned that lesson the hard way too, and it completely transformed my aloe. Your point about waiting for plump outer leaves before harvesting really resonates; I've had those stringy disappointment moments myself, and now I'm much more patient about it. Such a rewarding plant once you dial in that lean watering sweet spot.
I've killed two aloe veras before I finally got it right—turns out I was watering way too often. Now mine sits in a south-facing window and I water maybe once a month, and the leaves are thick enough to actually harvest from. The gritty soil tip is huge; I use cactus mix with extra perlite and it makes all the difference for preventing rot. Would love to see what soil ratio you're recommending, though my current setup is working so I might not change it.
I'm glad to see someone emphasizing the watering restraint—I've found Aloe barbadensis does so much better when you let the soil dry completely between waterings, especially indoors where evaporation is slower. The gel harvest timing makes a real difference too; I've noticed leaves harvested from mature rosettes are far more productive than taking from younger growth.
I appreciate how you've emphasized lean watering—that's the detail that separates thriving aloe from the mushy rot I see so often. I'm curious whether you've found any difference in gel quality between plants grown in very bright conditions versus bright indirect light, since I'm working with some afternoon shade in my arid setup and wondering if it affects potency for topical use.
I'd skip aloe for my setup—I'm in a cold climate and my five plants are all orchids, which actually thrive in the lower light and humidity I have. That said, I've kept aloe before and the "lean watering" point is spot-on; most people kill them with kindness. If you're in a warmer zone with decent indirect light, it's hard to beat for usefulness.
I totally get that—orchids are a different beast entirely, and honestly, if they're thriving in your space, there's no point forcing aloe into the mix. Though I'm curious, do you find the humidity orchids need actually helps *prevent* overwatering mistakes, or is it just a separate challenge altogether? I'm in a drier Mediterranean climate, so aloe basically takes care of itself, but I imagine someone caught between "too cold for succulents" and "not humid enough for typical orchids" has to get pretty creative.
I'd disagree slightly—aloe's genuinely low-maintenance, but I've killed more than a few by overwatering even in my tropical climate where everything else thrives. The real trick is treating it like a desert plant regardless of your humidity, and I keep mine in a pot with drainage holes plus extra perlite in the soil. Works beautifully, but lean watering isn't just a preference, it's non-negotiable if you want those fat leaves instead of mushy rot.
Totally agree—I learned that lesson the hard way my first winter up here in the cold! I was way too generous with water and ended up with mushy stems before I realized aloe doesn't care that it's freezing outside, it still wants to stay dry. The perlite mix is key; do you find you need to adjust watering seasonally at all, or do you pretty much keep the same sparse schedule year-round?
I'd gently push back on "most rewarding" for indoor growing—at least in my mediterranean climate, aloe thrives so easily outdoors that bringing it inside feels like underutilizing it. That said, your emphasis on lean watering is spot-on; I've seen far more failures from overwatering than underwatering, even among experienced growers. The propagation angle is useful, though I find leaf cuttings less reliable than pups for actually establishing robust plants.
You make a fair point about outdoor growing in warmer climates—I'm in a temperate zone, so indoor is really my only option, but I can see how that'd change the calculus entirely. Do you find the pups establish faster, or is it mainly just a higher success rate? I've had better luck with those too, though I've got a couple of leaf propagations going right now out of stubborn optimism. I'd definitely share a photo of the mother plant if I could—she's gotten surprisingly robust on a sunny windowsill despite our grey winters.
I've had my Aloe barbadensis for about six months now, and I'm still figuring out the watering rhythm—I think I was overwatering it at first. Does the "lean watering" approach mean waiting until the soil is completely dry, or is there a specific window you'd recommend checking? Also curious whether the gel quality changes depending on leaf age or plant maturity, since I'd love to actually use some eventually rather than just admiring it.
I'd definitely wait until the soil is *completely* dry—I usually give mine a week or two extra after that just to be safe, especially in a temperate climate like ours where evaporation is slower. The overwatering phase is so common, but it sounds like you've caught on! As for gel quality, I've noticed my older, thicker leaves do seem to have more usable gel, though honestly I mostly just use mine topically for minor burns and haven't done a side-by-side comparison. Have you checked if your plant is chunky enough to harvest from yet, or is it still building up reserves?
I appreciate this breakdown—aloe really is forgiving once you understand it needs almost nothing. I've found that in my arid climate, the biggest shift for me was *resisting* the urge to water; my aloe thrives on neglect in a way my orchids never could. That said, I'm curious whether you've noticed the gel quality varies much between plants grown in different light conditions, or if it's mostly about age and maturity.
I've killed more aloe vera plants by watering them than I'd like to admit—turns out Mediterranean-grown succulents really do want to dry out completely between waterings, not just mostly dry. My current plant sits in pure perlite mixed with cactus soil and gets water maybe every three weeks, and it's finally the chunky, gel-filled thing I was after. Does your guide go into soil amendments, or mainly stick to standard potting mix?
I appreciate the practical focus here. I've found that *Aloe barbadensis* does genuinely thrive on neglect, but I'm curious whether you recommend waiting until the plant reaches a certain age or size before harvesting leaves, or if younger specimens can handle it without setback? I've always been conservative about it, but I wonder if that's overly cautious.
I've learned the hard way that patience really does pay off with aloe—I harvested from a young plant once and it just sulked for months. I'd wait until it has several mature rosettes and is at least a year or two established before taking leaves. The plant bounces back so much faster when it's got that solid foundation, and you'll have plenty of gel-filled leaves to work with.
I appreciate the focus on lean watering—I killed my first aloe by fussing over it too much, thinking succulents needed regular attention. Now I keep mine in a terra cotta pot with gritty cactus mix and water maybe once a month even in my cold climate, and it's finally thriving. Have you found that the harvesting method (cutting outer leaves versus the inner ones) makes a difference in how quickly the plant regenerates?
I appreciate how thorough this sounds—aloe really does thrive on neglect, which is honestly refreshing after fussing over my orchids. My main struggle with succulents has always been overwatering, especially in our arid climate where I tend to second-guess myself. Do you find that potting medium makes a bigger difference than people realize, or is drainage the real make-or-break factor?
I've had my aloe (Aloe barbadensis) for about eight months now, and I'm finally starting to understand why it kept getting mushy—I was watering it way too often! Your point about lean watering really resonated with me, and I'm curious whether you'd recommend letting the soil dry out completely between waterings, or just mostly dry? I've moved mine to a brighter south-facing spot and it's looking much healthier already.
I've been really wanting to try aloe vera, but I'm worried about keeping it happy in my cold climate—does it do okay as an indoor plant year-round, or would I need to move it seasonally? I love that it's practical too, since I'm still building my collection and want plants that actually do something for me beyond looking nice.
I've had my aloe in a cold kitchen window for two years now and honestly, the trickiest part for me was resisting the urge to water it—I killed my first one by treating it like my herbs! The one thing I'd add is that if you live somewhere chilly like I do, let the soil dry out *completely* between waterings, even more than the guides say. Have you found a particular soil mix works best, or is standard cactus mix pretty reliable?
I appreciate how much you've emphasized the lean watering—that's really the linchpin for aloe success indoors. I've found that letting the soil dry out completely between waterings, especially in winter, makes all the difference between a thriving plant and one that quietly rots. The gel extraction tip is helpful too, since so many people don't realize you can harvest outer leaves without killing the plant.
I've had aloe for years and the one thing that actually made a difference was switching to pure grit and perlite mix instead of cactus soil—drains fast enough that I stopped second-guessing my watering. The gel harvest tip is solid too, though I'd add that you want leaves that are fully mature (thicker at the base) or you'll get mostly water. Do you find aloe propagates better from pups or leaf cuttings in your experience?
I'm totally with you on the grit mix—I switched mine over a couple of years ago and it's been a game-changer for peace of mind. On propagation, I've had much better luck with pups, honestly; my leaf cuttings tend to rot before they callus over, probably because I baby them too much. The pups just seem to know what they're doing from the start.
I've kept Aloe barbadensis for years now and it's honestly the easiest thing in my collection—I mostly just ignore it, which seems to be exactly what it wants! The gel harvesting tips are super practical; I use mine for minor burns in the kitchen all the time. Did you find that leaf propagation works better if you let the cut end callus over for a few days before potting, or does it not make much difference in your experience?
I've killed more aloe plants than I'd like to admit by overwatering them, so I'm glad you emphasized the lean watering approach! I finally got the hang of it when I moved mine to a sunny spot on my kitchen windowsill and basically forgot about it for months—now I've got three healthy plants and actually use the gel on minor burns and dry patches. Have you found that aloe does better in terracotta pots, or does the container material matter less than people think?
I appreciate the practical angle here, though I'd push back slightly on aloe being "rewarding" indoors in cold climates—I've found they really need that aggressive light and warmth to stay compact and gel-filled rather than stretching into pale, watery versions of themselves. Mine does okay by a south-facing window, but honestly it's the least interesting plant in my small collection. That said, the propagation angle is solid; I've had better luck with leaf props than I expected, so if someone's got a leggy aloe taking up space, that's worth trying before tossing it.
You're so right about the cold-climate struggle—I've got just the one aloe, and it's definitely my most temperamental plant when the heating kicks in. Mine got that exact pale, stretched look last winter despite the south-facing window, so I've basically accepted it's going to be less impressive than it would be somewhere warmer. The leaf propagation tip is gold though; I've got a few babies going from my leggy plant, and they're somehow more satisfying to watch than the parent!
I've kept aloe for years in my mediterranean climate and the one thing I'd stress is that "lean watering" really means it—I see people kill theirs by watering on a schedule rather than waiting until the soil is completely dry and the leaves start to thin slightly. The gel harvest angle is useful too, though I find the plants grow faster if you just leave them alone and don't strip leaves constantly. What's your take on propagating from offsets versus leaf cuttings—do you find one method actually outperforms the other, or is it more about what leaves you have available?
I've had *Aloe barbadensis* thriving in a shallow terracotta pot with gritty, fast-draining mix for about three years now—it's easily the lowest-maintenance plant in my collection. The gel production really does correlate with how lean you keep the watering; I learned that the hard way with my first aloe by overwatering. If I had a photo to share, you'd see how dramatically different the leaf texture is between my Mediterranean-conditioned specimen and one a friend keeps in standard potting soil indoors.
I've killed more aloe vera plants than I'd like to admit by watering them on a schedule rather than checking the soil first—they really do need that long dry spell between waterings, especially in humidity. The one thing that finally worked for me was repotting into terracotta with a gritty cactus mix and letting it sit in a bright window; the porous pot makes it almost impossible to overwater by accident.
I've killed more aloe plants through kindness (read: overwatering) than I care to admit, so I'm glad you're leading with the lean watering bit—that's really the make-or-break factor in my arid climate. Once I switched to watering only when the soil is completely dry and repotted into gritty cactus mix, mine finally thrived instead of rotting from the roots up. The gel payoff is genuinely worth the restraint!
That root rot pattern is so common—*Aloe barbadensis* really does demand that restraint. I've found the gritty mix makes an even bigger difference than people expect; it's not just about drainage but also how quickly the rhizosphere dries after watering. Once you nail that soil composition, the plant basically tells you when it needs water through leaf texture rather than guesswork. Glad you got there with yours.
I'd push back gently on aloe being "rewarding"—mine took two years to actually thrive indoors because I kept overthinking the watering. Once I accepted it genuinely prefers neglect and dropped the "lean watering" habit for more like "forget about it for weeks," the leaves plumped up fast. Curious if your guide emphasizes just how dry the soil needs to get, because that's where most people stumble.
I've had decent success with aloe indoors, though I'll be honest—it thrives way better on my Mediterranean balcony than anywhere inside my flat. The trick I've found is being even *leaner* with water than most guides suggest; I basically let mine dry out completely and then wait another week before watering. Have you found that timing shifts depending on season or light conditions where you are?
I appreciate how practical this guide sounds—aloe vera's resilience makes it such a forgiving starter plant, though I've always found the watering restraint harder to master than people expect in humid climates. Since you mention gel harvesting, I'm curious whether you recommend waiting until leaves reach a certain maturity before taking them, or if you just harvest as needed?
I've got an aloe that's been doing okay but the leaves feel a bit thin and droopy—I'm wondering if it's a light issue since my Mediterranean apartment gets decent sun but maybe not *enough*? Would love to see a photo of what healthy, plump leaves should actually look like to compare against mine, but this post sounds like it'll help me figure out where I'm going wrong with watering too.
I've got about 15 plants in my collection and aloe is honestly one of the easiest—though I learned the hard way that "lean watering" really means *lean*. I killed my first one by being too generous, so now I only water mine when the soil is completely dry and I live somewhere cold, which helps. Have you found that people tend to overwater these, or does that seem less common with succulents in general?
I've kept aloe for years and honestly the "lean watering" part is where most people mess up—they baby it and kill it with kindness. Mine thrives on neglect, basically watered every 3–4 weeks in my tropical climate where humidity is already high. The gel harvest is genuinely useful if you actually use it, but I'd say wait until the plant is established before you start cutting leaves, or you'll stunt growth. Nice to see a post that doesn't overcomplicate it.
I'd love to try aloe indoors again—mine always got too leggy in my temperate apartment, even on the sunniest windowsill. Did you find that upping the light intensity or adjusting water frequency made the biggest difference for keeping them compact? I'm curious whether you lean toward the "neglect it" school of succulent care or if there's a sweet spot I've been missing, because honestly, it's the one plant in my collection of eleven that consistently frustrates me.
I've been meaning to get serious about *Aloe barbadensis* after years of half-hearted attempts—something about my temperate apartment always left the leaves a bit thin. Your soil breakdown actually makes sense though; I think I've been watering too generously out of habit with my other herbs. Does the gel quality change noticeably depending on leaf thickness, or is it more just about the plant's overall vigor?
Oh, I totally get that—I learned the hard way in my cold place that overwatering basically ruins aloe! From what I've noticed with mine, thicker leaves definitely produce gel that feels more substantial and less watery, so it's worth dialing back your watering schedule. Since you mentioned your other herbs, are you keeping the aloe separate from those in terms of watering routine? That's what finally worked for me—treating it almost like a neglect thing compared to my basil and oregano.
I'll be honest—aloe works fine indoors, but it's never thrived for me the way it does in drier climates. My one decent specimen sits in a south window and barely gets watered in winter, which is the only reason it stays plump rather than shriveled. The propagation from pups is genuinely straightforward though; that part always works. I'd rather focus my limited space on orchids, which perform better in my cold climate, but if someone's got consistent bright light and won't overwater, aloe is definitely forgiving enough to justify the space.
I totally get that—aloe definitely needs that intense, consistent light to really thrive indoors, especially in cold climates like ours where humidity works against it. The pups are such a win though; I've had better luck propagating those than keeping the mother plant happy long-term. Since you're cold-climate focused anyway, have you found any succulents that actually *prefer* your conditions, or do you mostly stick with the orchids?
I've killed more succulents than I'd care to admit, so I'm grateful for guides like this—aloe's forgiving nature has been a lifesaver in my arid climate. My one concrete tip: I kept mine perpetually soggy until I realized my potting mix needed way more perlite than I thought, since even "well-draining" soil can hold too much moisture indoors where evaporation is slower. Now mine finally has those satisfying plump leaves you mentioned.
I've killed more aloe veras than I'd like to admit by overwatering, so I'm glad you're emphasizing lean watering—that's the real make-or-break factor indoors. I've had better luck with mine in terracotta pots that actually let the soil dry out properly, which my ceramic ones never did. How often do you typically water yours in winter, or do you just let the soil moisture guide you year-round?
I've killed exactly two aloe plants in my arid climate—which sounds backwards until you realize I was overwatering like they were orchids! Once I switched to gritty soil and basically ignored them, they thrived. My current one's honestly the lowest-maintenance plant in my collection of 14, so I appreciate the emphasis on lean watering. I'd love to snap a photo of mine next to my struggling phalaenopsis to show the contrast, but the aloe always looks smugly perfect in pictures.
I've had mixed luck with aloe over the years—my current one is thriving, but I killed two before realizing they really do prefer neglect over attention! My question is about propagation: do you find the pups propagate faster if you leave them attached to the mother plant longer, or does it matter once you've got decent roots? I've got a photo of mine that's throwing out babies everywhere, and I'm curious if there's a real difference in success rates.
I've learned the hard way that aloe really suffers in anything but gritty, well-draining soil—I killed my first one by using standard potting mix. Now I amend with perlite or coarse sand at least 40%, and water only when the soil is completely dry; mine sits in a bright window and barely needs attention. The gel harvest tip is great, but I'd add that younger plants (under a year) tend to have thinner leaves, so I wait until mine are established before taking cuttings.
I've been wanting to try growing aloe vera but wasn't sure if it would do okay in my cold climate—most of my collection is native plants that handle winters better. Does aloe really need to stay indoors year-round where you are, or have you had success moving it outside during warmer months?
I keep mine indoors year-round since I'm in a pretty mild Mediterranean zone, but honestly, I think you could absolutely move it outside during your warm months—Aloe barbadensis is pretty forgiving as long as it's not getting frost. Have you thought about giving it a sheltered spot outdoors in summer? I'm curious whether your cold winters would actually be an issue if you brought it in before the temperature drops.
I appreciate the practical focus here—aloe really does reward that hands-off approach. One thing worth noting though: while aloe vera thrives indoors under bright light, *Aloe arborescens* actually holds up better in consistently warm, arid climates if someone's in a genuinely dry region. I've found the gel quality improves dramatically with that extra heat and low humidity. Either way, lean watering is absolutely the move; that's where most people slip up.
I've found aloe to be almost *too* forgiving indoors—mine barely drinks water through winter and honestly thrives on neglect. That said, I'm curious whether you've noticed differences in gel quality depending on growing conditions? I kept one in a shadier spot for a while and the leaves felt thinner, almost less substantial. Since I'm in a mediterranean climate, I mostly let mine dry out completely between waterings, but I imagine the approach changes pretty dramatically if someone's in a humid zone. Did you touch on humidity considerations in your harvesting section?
I've had my aloe tucked in a sunny corner for about three years now, and honestly it thrives on neglect—which is perfect for someone like me who's got ten plants competing for attention! The one thing I learned the hard way was overwatering in my first year; the leaves got all mushy and I nearly lost it. Now I just wait until the soil is completely dry and it's been a game-changer. Are you a fan of using the gel fresh from the plant, or do you prefer letting it sit in the fridge first?
I've had my aloe for about eight months now and it's finally looking healthy after I stopped overwatering it—so this is timely! I'm still figuring out the harvesting part though—when you say the leaves should be mature enough, is there a specific size or age I should look for, or does it come down to feel? I'd love to actually use the gel instead of just keeping it as decoration. I have a photo of mine if that'd help show where I'm at with it.
Nice to hear you've cracked the watering issue—that's honestly half the battle with Aloe barbadensis! For harvesting, I'd wait until the outer leaves are at least 3-4 inches long and feel properly plump; younger inner leaves won't have much gel yet. The leaves should snap cleanly when you bend them, and you want that translucent gel inside, not just watery stuff. I'd love to see your photo—my aloe (one of eleven right now) took forever to get thick enough leaves too, so I'm curious where yours is in that journey. Are you planning to use the gel fresh or make anything with it?
I'm glad someone else struggled with overwatering—I killed my first aloe that way! From what I've read, you want leaves that are thick and plump all the way through, usually from the outer rosette, and most sources suggest waiting until the plant is at least 3–4 years old before harvesting. I have a photo of mine on my phone that I'd share too—I'm still not 100% sure if mine are quite ready, so if you figure out the feel part, let me know!
I killed my first aloe by watering it like it was a needy houseplant instead of a desert dweller—lesson learned the hard way! Now I've got three thriving ones scattered around my apartment, and honestly, the harvesting part is so satisfying. I love snipping a leaf when my skin needs it, plus watching the plant keep pumping out new growth makes me feel like I'm actually getting somewhere with my collection.
I love hearing this—that overwatering realization is such a common turning point. The satisfying part is that once you've lived through it with one species, you've basically unlocked the mindset for most succulents. I've found *Aloe barbadensis* (the true medicinal type) actually prefers to dry out almost completely between waterings in arid climates, so if you're harvesting regularly, you're probably giving it exactly the light, infrequent attention it craves. Three plants thriving sounds like you've nailed your routine.
I've had my aloe for about eight months now and finally got it to that plump stage you're describing—turns out mine was staying too wet in regular potting soil. Once I switched to a cactus mix and backed off watering to maybe once every three weeks, it actually started thriving. I'm curious though: when you harvest for the gel, do you take full leaves from the base or can you just cut sections from larger leaves without killing the plant?
I've been wanting to try aloe vera since I keep reading about how useful the gel is, but I'm worried about overwatering it in my cold climate—do you find that the dormancy period in winter really changes your watering schedule, or does it stay pretty minimal year-round? I'm hoping it might be a good fourth plant for my small collection since succulents seem more forgiving than what I've been struggling with.
I'd say winter dormancy does matter—I've killed more aloe by being *too* attentive in cold months than by neglect. In my arid climate I water maybe once a month year-round, but if you're somewhere humid and chilly, I'd stretch that even longer when temps drop. Honestly though, aloe's been one of my most forgiving plants; it's actually taught me that succulents *want* to be ignored, which has genuinely helped my other 13 plants survive my tendency to fuss over them!
I appreciate how straightforward you've kept this—aloe really does thrive on neglect in the right conditions. I'm curious whether you've found the gel quality differs much between plants grown in bright, dry climates versus those kept indoors under lights. My two orchids are pretty fussy about humidity, so I haven't attempted aloe indoors yet, but your mention of lean watering makes me think it might actually be less demanding than some of the desert-adapted Cattleyas I struggle with in the arid Southwest.
I've had my aloe vera (*Aloe barbadensis*) for about eight months now, and I'm still figuring out the watering—I think I overwatered it early on and the lower leaves got mushy. Since moving it to a sunnier spot and switching to a gritty cactus mix, the new growth looks much healthier. I'm curious whether you have a preference between propagating from pups versus leaf cuttings, since I've only tried the pup method so far and it seemed more reliable?
I've had great success with Aloe barbadensis in my collection, though I have to admit it took me a while to resist overwatering—that lean approach you mention really is the key. The gel harvest tips are particularly helpful since so many people don't realize you can propagate from those leaf cuttings too. Do you find the plants do better with a winter dormancy period in your growing conditions, or do you keep them active year-round?
I've had mixed luck with aloe over the years—mine always seemed to get too cozy in humidity and start rotting at the base, which is embarrassing for a supposedly foolproof succulent! I'm curious whether you'd recommend the same "neglect it" approach indoors in tropical climates, where the air itself is basically a humidifier? I've had better success with my orchids in that environment precisely because I lean into the moisture, so I'm wondering if aloe would actually appreciate drier potting conditions even more than the typical succulent in a tropical home.
I killed my first aloe by overwatering—classic mistake—but once I switched to a gritty cactus mix and basically ignored it, the plant thrived. Now I actually harvest the gel occasionally, which feels so satisfying. Your point about lean watering really is the key; I think a lot of people don't realize how drought-tolerant these are.
I've killed exactly one plant in my life, and it was an aloe—overwatered it to a soggy grave despite knowing better. Your point about lean watering really resonates; I've since learned that *Aloe barbadensis* actually prefers to dry out completely between waterings in my Mediterranean climate, and it's made all the difference with the one I'm nursing back to health now. The gel harvesting angle is what really sold me on giving it another shot though.
I've killed more aloe than I'd like to admit by overwatering in my dry climate—turns out even "low water" isn't low *enough* for me! Switched to watering mine only when the soil is bone dry and letting them sit in bright, indirect light, and suddenly they're actually plump instead of translucent and sad. The propagation tip is golden too; I've got five plants now from leaves that fell off one original pot, which feels like redemption.
Oh, I feel this in my bones—I killed my first aloe the same way! The thing that finally clicked for me was switching to a gritty soil mix (I use cactus soil with extra perlite) so water just runs through instead of sitting around the roots. Since I'm in a cold climate, I barely water mine at all in winter, maybe every 3–4 weeks. Have you found a difference between propagating from single leaves versus breaking off whole offshoots?
I've had great success with aloe indoors, though I'd gently push back on the "lean watering" framing—I find the real trick is infrequent watering in well-draining soil rather than stingy amounts when you do water. My specimens respond better to a thorough soak followed by a long dry period than to frequent light waterings. Curious whether your guide touches on how the pot choice affects drying time, since I've noticed clay makes a significant difference compared to plastic.
I've learned this the hard way—my first aloe got mushy because I was watering it like my tropical plants! Switching to a gritty cactus mix and basically ignoring it between waterings transformed mine into this gorgeous specimen that actually produces usable gel now. Do you find that most people overwater them, or is it just me being paranoid after that first disaster?
I've kept aloe for years and honestly the biggest difference for me was realizing it's happier bone-dry than "moist"—I water mine maybe once a month in my tropical setup and it thrives. The gel extraction tip matters too; I'd rather share a photo of my mature plant's propagation success than pretend every offset survives, but the ones that do are painfully easy. Good practical breakdown here.
I'm with you on the watering—I've got four succulents in my collection and my *Aloe barbadensis* nearly rotted before I accepted it needed even less than I was giving it. Now I let the soil dry completely between waterings and only water every 4–6 weeks even in growing season. The propagation point is spot-on; I've had failed offsets too, but the ones that take just need neglect and good drainage to establish. Glad someone else is being honest about the actual success rate instead of making it sound foolproof.
I've got one aloe that's doing okay but the leaves aren't as plump as they should be—I think I'm watering too much even though I'm trying not to. Would love to see if the soil mix you recommend makes a real difference, because mine's just regular potting soil right now. Also keen to learn the harvesting bit since I've never actually used the gel before, so if you've got a photo showing which leaves to take I'd definitely pay attention to that.
I've been trying to grow a single aloe for about six months now, and I'm finally seeing it perk up after moving it to a sunnier spot. I was definitely overwatering it at first—I didn't realize how little these plants actually need. This guide is exactly what I needed, especially the part about harvesting because I keep wondering if I'm allowed to break off a leaf yet or if that'll hurt it.
Your experience mirrors what I've found with *Aloe barbadensis*—mine sat sulking for months in moderate light before I moved it closer to the window, and it transformed. The gel-filled leaves do signal readiness to harvest once they're mature enough (usually after the plant's been established a few seasons), so you're likely getting close. I'd suggest breaking off a lower leaf rather than the crown; it regenerates without stress and gives you a proper sense of when the gel production is at its peak.
I'd push back slightly on aloe being "rewarding" indoors—in my experience it needs more light than most people realize, and it'll stretch or rot faster than you'd think if you're in a dimmer space. That said, the lean watering advice is spot on. I keep one in a 4-pot collection and it's honestly the most forgiving plant I own once you stop fussing with it. Would be curious to see your thoughts on propagating the pups versus leaf cuttings—I've had mixed results and suspect climate matters more than people admit, especially in tropical conditions where humidity can work against you.
I've killed more aloe plants than I'd like to admit by overwatering in my cold climate—turns out they really do prefer neglect! My turning point was switching to cactus soil mixed with extra perlite and watering only when the pot feels genuinely light. Now my three aloe are thriving, and I actually use the gel regularly on dry winter skin. Did you find a particular soil ratio works best, or is the standard succulent mix sufficient?
I appreciate how thorough this is, especially on the watering side—overwatering is really where most people stumble with succulents. My arid climate is ideal for aloe, though I've had better luck with it than I have with my two orchids, which honestly demand a lot more finesse. Do you find that propagation from leaf cuttings works better than division for folks just starting out?
I've killed more aloe than I'd like to admit by overthinking the watering—turns out my Mediterranean climate means mine practically thrive on neglect once established. My one real tip: if you're in a humid region or keep it indoors year-round, err even *leaner* on water than the guides suggest, because soggy roots are truly the only way to lose these things. The gel harvesting is where aloe really earns its place in my collection though.
I totally get the overthinking trap—I did the same thing when I first started with succulents! Your point about humidity is really valuable though; I've noticed my aloe actually does better in winter when my Mediterranean air is drier, even though that's counterintuitive. Do you find the gel quality changes much depending on how you water, or does lean watering just keep the plant healthier overall?
I killed my first aloe by loving it too much with water, so I'm grateful you emphasized the "lean" part—mine now lives in a sunny corner and barely sees me between waterings, which is apparently exactly what it wants! The gel harvesting tip is especially useful since I finally have a mature plant that's producing enough to actually use without feeling guilty about it. Are you finding that aloe propagates more reliably from pups or leaf cuttings in your experience?
I appreciate the focus on lean watering, but I'd gently push back on "most rewarding indoors"—aloe really needs that intense, consistent light that's honestly hard to replicate inside, especially in tropical climates where I grow mine. They tend to stretch and weaken without it, which defeats the purpose. Mine thrives on a south-facing balcony where it gets unfiltered sun most of the day. If your readers are in genuinely bright spaces, great, but I'd hate for someone to struggle with a leggy plant and think they're doing something wrong.
I think you've got a fair point about the light requirement—aloe *will* etiolate without enough intensity, and that's often where indoor growers run into trouble. I've found the same thing with my specimen; even a bright south window in my temperate zone doesn't quite match what it needs in summer. That said, I've had decent results using a grow light positioned close during winter months, which helps prevent the stretching you're describing. Your setup sounds ideal though—full unfiltered sun is really the gold standard for keeping the leaves compact and productive.
I've had *Aloe barbadensis* for years and the single biggest difference for me was switching to gritty, fast-draining soil—I mix standard potting soil with perlite at about 1:1 ratio. The plump leaves everyone wants only happen when you're not accidentally keeping it damp between waterings, which is way easier to manage with soil that actually dries out.
That 1:1 perlite ratio is gold—I learned the hard way after my first aloe turned into a mushy disappointment. The gritty soil really does make all the difference, especially since I can't give mine the blazing southwest window it probably deserves in my cold climate. Have you found that the faster drainage also helps during winter when growth slows down?
I've been struggling a bit with my aloe—it stays pretty compact but the leaves feel thin rather than plump, so I'm wondering if I'm underwatering or if mine just isn't getting enough light in my tropical setup where everything else thrives. I'd love to see photos of what healthy, gel-filled leaves should look like, because I'm still learning to read those visual cues. Does the soil composition matter much more for aloe than it does for my other succulents, or is it mainly about drainage?
I'd gently push back on aloe as "rewarding" for indoor growing in temperate climates—mine stays perpetually pale and slow despite bright south-facing light, which suggests it really needs more intensity than most homes provide. That said, I've had better luck treating it more like a true xerophyte: coarser grit in the mix, longer dry spells between waterings, and honestly just accepting slower growth rather than chasing those plump leaves. Curious whether your experience is in a sunnier region or if you've found a trick for keeping the color vibrant indoors?
I'd gently push back on "lean watering"—in arid climates like mine, I've found *infrequent* watering matters far more than the amount per session. My *Aloe barbadensis* actually thrives on the soak-and-dry method every 3–4 weeks rather than a light, frequent schedule, which can trap moisture around the crown. The soil composition (gritty, 60% perlite or coarse sand) does most of the heavy lifting to prevent rot.
You're absolutely right about the soak-and-dry method—I learned that lesson the hard way with my first aloe, which started rotting despite what I thought was careful watering. The soil really is the foundation; I switched to a 50/50 mix of potting soil and perlite and haven't had issues since. Does your gritty mix work equally well for other succulents you're growing, or have you found aloe is pickier than most?
I appreciate the focus on practical care, though I'd gently push back on aloe being "rewarding" indoors unless you have genuinely bright light—mine always got leggy on a normal windowsill. Where it really shines for me is outdoors in summer or in a greenhouse setup; that's when you get those thick, gel-filled leaves worth harvesting. The lean watering advice is spot-on though, that's where most people fail with aloe.
I've always found aloe a bit tricky in my arid climate—it thrives outdoors but gets leggy indoors without truly intense light. I'm curious whether your soil recommendations lean toward the gritty side, since I've had better luck mixing in extra perlite than I expected to need. The propagation angle is what really interests me though, since I haven't pushed myself to try leaf props beyond a few experiments.
I'd say your extra perlite instinct is spot-on—Aloe vera really does want that drainage, especially indoors where air circulation tends to be weaker. The leggy growth you're seeing is classic; even with supplemental lighting, it struggles without that intense direct sun. On leaf propagation, I find the success rate climbs significantly if you let the severed leaves callus for a full week or two before setting them on dry soil—patience there seems to matter more than technique itself.
I've got three aloe plants and honestly struggle with the watering part—I live in a Mediterranean climate so my home stays pretty dry, which I'd assume helps, but I'm never sure if I'm letting them go *too* long between drinks. Do you find there's a real difference between indoor aloe care and what they'd experience in their native habitat, or is the "lean watering" rule pretty universal?
I've had mixed luck with Aloe barbadensis over the years—mine honestly thrives on neglect, which is perfect since I tend to overwater everything else in my collection! The gel harvest tip is something I wish I'd known sooner; I was being way too cautious before. Have you found that certain light conditions actually affect the gel quality, or is it more just about getting healthy leaves? I'd love to know if you've noticed any difference between indoor and outdoor plants, since mine are currently indoors in a temperate climate and the leaves seem a bit thinner than I'd like.
I've noticed the same thing—mine practically demand neglect to thrive. On gel quality, I'd say light matters more than most people realize; my plants grown under strong, direct sun produce noticeably thicker leaves with denser gel compared to my indoor specimens, which tend toward that lankier growth you're describing. In a temperate climate indoors, you might benefit from a grow light or moving them closer to a south-facing window if possible, since *Aloe barbadensis* really does want that intensity to develop proper substance.
I've been wanting to grow aloe for a while but kept worrying I'd kill it with too much water—I tend to overwater everything. Does aloe really thrive on neglect like people say, or is there a sweet spot I should aim for? I'd love to try harvesting the gel once mine gets established, so this guide sounds perfect.
I've killed more aloe plants than I'd like to admit by overwatering, so I'm glad you emphasized the lean watering—that's really the make-or-break factor. I keep mine in a terracotta pot with cactus soil now and only water every three weeks or so, and it's finally thriving. The gel harvesting tip is useful too; I have a photo of mine currently getting ready to flower for the first time, which I didn't even know they could do indoors until this happened.
I'm so relieved to hear someone else admit the overwatering trap—I drowned my first aloe within months! Your terracotta-and-cactus-soil setup sounds ideal, and that flowering photo must be amazing; I haven't managed to coax blooms from mine yet, probably because my apartment stays pretty cold in winter. Did you have to do anything special to trigger the flowers, or did it just happen once you got the watering dialed in?
I've kept aloe for years and honestly the biggest mistake I see people make is overwatering—they treat it like a regular houseplant instead of accepting it wants neglect. My plants thrive on infrequent watering and gritty soil with extra perlite mixed in. One thing I'd add: if your aloe starts looking pale or translucent, that's usually overwatering damage, not light hunger. Are you finding the gel harvesting approach makes a practical difference for readers, or do most people just keep them for looks?
I completely agree on the overwatering trap—I learned that the hard way with my first *Aloe barbadensis*. What really clicked for me was switching to a pot with drainage holes and letting the soil dry out fully between waterings; now mine are genuinely plump instead of that translucent, mushy look. The gritty soil mix you mention is essential, though I've found adding extra perlite is more forgiving than pure cactus mix if you're nervous about watering frequency.
I've killed more aloe than I'd like to admit by fussing with watering—turns out my mediterranean herbs taught me the same lesson aloe needs: neglect is a feature, not a bug. The one that finally thrived was when I stopped checking the soil and just watered deeply every three weeks or so, letting it dry out completely between. Worth mentioning that harvesting the outer leaves actually seems to encourage bushier growth, so you're not just getting gel, you're shaping the plant at the same time.
I've had *Aloe barbadensis* for about five years now, and the shift to minimal watering was genuinely transformative—my first one rotted because I treated it like a standard houseplant. The gel harvest tip is solid; I've found that waiting until the outer leaves are truly mature (rather than harvesting younger growth) gives you substantially more usable material and doesn't stress the plant as much.
I've had mixed results with aloe indoors in my arid climate—mine thrives, but I've learned the hard way that "lean watering" needs to mean truly sparse in winter or the roots rot fast. The gel harvest tip is helpful since most people don't realize you can remove outer leaves without killing the plant, though I'd emphasize waiting until the rosette is established first. Mine took about two years before I felt comfortable harvesting regularly.
I'd second the winter dormancy point—I made that exact mistake my first year and lost a plant. The two-year timeline for confident harvesting makes sense too; mine's just hitting that mark now and the outer leaves are finally substantial enough to use without feeling like I'm gutting it. Are you harvesting regularly now, or do you still take a cautious approach even with an established plant?
I've killed more aloe plants than I'd like to admit by overwatering them during our humid winters here—turns out that "lean watering" advice is really the make-or-break part! Now I just let mine dry out completely between waterings and keep it near my south-facing window, and it's thriving. Do you have specific recommendations for people in colder climates where indoor humidity tends to stay high, or is the basic rule of waiting for totally dry soil pretty foolproof?
I appreciate the focus on lean watering—that's where most people go wrong with *Aloe barbadensis*. I keep mine in a gritty, mineral-heavy mix (about 40% perlite) and only water when the soil is bone dry, which in my Mediterranean climate means every three weeks in summer and barely at all in winter. The gel quality really does improve when you resist the urge to coddle them. I'd photograph my largest rosette next to my other four succulents to show the leaf plumpness that comes from this restraint, but the practical harvesting advice here is solid.
I'd skip aloe if I had the space, honestly—it thrives on neglect but that's exactly why mine gets forgotten and rots in winter humidity. My cold climate means I have to treat it more like a tropical than a succulent, and it's just not worth the fiddling when my orchids are far more rewarding with the right conditions. That said, if someone's in a drier area, this guide looks solid on the propagation side.
I totally get that—I've killed my share of aloe by watering it like I water my basil! The winter rot thing sounds brutal with your humidity. I'm in a mediterranean-ish climate, so mine actually seem happier than I expect, but I've learned to basically ignore them from November onwards. Maybe the trick is just knowing your own space too well to follow generic care guides, which it sounds like you do with your orchids.
I appreciate the practical focus here, though I'd gently push back on "indoors" as the default for aloe. *Aloe barbadensis* really thrives when it gets intense, direct sun—something most indoor setups struggle to provide—and even my best-lit specimens in the house are noticeably less vigorous than those I keep on my patio. For anyone in an arid climate, outdoor or greenhouse growing will give you those plump leaves and harvestable gel much faster.
I'd gently push back on "indoors" being ideal—I've found *Aloe barbadensis* genuinely thrives better on a bright south-facing windowsill in arid climates, and honestly struggles with the humidity and low light most indoor setups provide. The gel quality seems noticeably better when plants aren't fighting etiolation. Your point on lean watering is spot-on though; that's where most people sabotage themselves.
You make a really good point about climate mattering more than I initially thought. I've kept mine on a bright shelf indoors in a tropical space, and it does get leggy compared to what I see in drier regions—I've actually had to propagate mine a few times because of that stretch. Your note about gel quality is spot-on; I hadn't connected the etiolation to that, but it makes sense.
I appreciate the focus on lean watering—that's where most people fail with aloe. I'd push back slightly though: indoors with typical light, even "bright" setups often aren't quite enough, and I've found mine stay leaner and less productive until I moved them to a south-facing spot. That said, they're genuinely forgiving compared to other succulents, and the gel payoff makes them worth the space. I've got three established plants that I harvest from maybe twice a year without stressing them.
I'm totally with you on the light—I learned that one the hard way too. My aloe (Aloe barbadensis) stayed stubby and pale until I got it in a genuine south-facing window, and the difference in leaf thickness was dramatic. The gel productivity really does follow the light quality, which most guides gloss over. Do you find the plants recover quickly if you move them back indoors for winter, or do they stay diminished?
I killed my first aloe by watering it like my other tropical plants, so I really appreciate guides like this that spell out the lean watering part. Mine now lives in a bright east-facing window and I've finally got that plump leaf situation you mention—makes it so much more satisfying to harvest gel when you actually need it instead of just watching it slowly shrivel.
I made the exact same mistake with mine! I was treating it like my Monstera deliciosa and nearly drowned the poor thing. Now I water mine maybe once a month in the dry season, and it's thriving—those plump leaves are so satisfying. Did you find the gel quality improved once the plant got healthier, or was it about the same once you started harvesting?
I love this take on aloe—mine's thriving on a sunny kitchen shelf, and I've found that the one mistake people make is overwatering even more than the guide probably warns. Do you find that aloe propagates easily from offsets in your climate, or does it take patience? I've had mixed success with mine depending on the season.
I've kept aloe for years and the one thing I'd push back on is "lean watering"—mine actually thrives on neglect, especially in my cold climate where it sits dormant half the year. I water maybe once a month in winter and only when the soil is bone dry. The gel quality stays just as good, and I've had fewer rot problems than when I was being too generous. Did you find watering frequency changes much based on season or indoor temperature?
I really appreciate the focus on lean watering—so many people kill aloe with kindness. One thing I'd gently push back on though: "one of the most rewarding" might undersell how genuinely forgiving *Aloe barbadensis* actually is. In my experience, it's harder to fail with aloe than almost any other succulent I grow, even in less-than-ideal light. The practical harvesting angle is spot on though; there's something satisfying about snapping off a mature leaf and actually using it.
I've had mixed luck with aloe—mine actually got leggy in my cold Minnesota home because I underestimated how much light it needs on shorter winter days. Once I moved it to a south-facing shelf, it plumped up way better! Did you find that winter light matters differently depending on climate, or is the "bright light" rule pretty universal for you?
Oh wow, that's super helpful to know! I'm in a temperate zone too, and I've honestly been worried about my aloe during winter—it's currently on an east-facing windowsill and I'm wondering if I should move it somewhere sunnier like you did. Did you find the leggy growth went away pretty quickly once you switched it to that south-facing spot, or did it take a while to recover?
I've had good luck with aloe in my drier climate, though I have to admit it's not my main focus—orchids are where my heart really is. That said, the emphasis on lean watering is spot-on; I see so many people kill these by overthinking the hydration. Your point about bright light paired with minimal water is exactly what makes aloe such a low-maintenance addition to a sill, even alongside thirstier plants. Have you found that propagation success varies much depending on which part of the rosette you take the pups from?
I'd gently push back on "rewarding bright light"—*Aloe barbadensis* actually tolerates lower light than many succulents, though it does get leggy without enough. The bigger win in my experience has been resisting the urge to water; I keep mine in a gritty mix and go weeks between waterings, even in summer. Curious if you found a particular soil ratio that worked best for preventing rot while keeping the leaves plump.
I've had *Aloe barbadensis* on my kitchen windowsill for years now, and honestly it's been one of the easiest keepers in my collection of eleven. The gel harvesting tip is golden though—I used to just yank leaves and waste half the plant, but learning to cut at the base makes such a difference. Do you find the propagation works better with leaf cuttings or offsets in your experience? I've had spotty results with leaves but the pups seem to take almost every time.
I've had pretty good luck with aloe over the years—it's definitely one of the more forgiving plants in my collection of eleven. My one thing though is that I find they actually do better with *slightly* more water than most people think, at least in my temperate climate where the air's drier indoors. I'd love to know if you've run into that, or if you stick to the "barely water it" approach? Also curious how you handle propagation—I've got a massive mother plant that's begging to be divided, but I always second-guess the timing.
I've kept Aloe barbadensis for years and learned the hard way that "lean watering" really means it—I nearly lost a healthy plant by watering on a schedule rather than checking soil dryness first. Now I only water when the potting mix is completely dry, usually every 3–4 weeks in my tropical climate. The gel production noticeably improved once I stopped fussing with it.
You're spot on about the schedule trap—I made that same mistake with mine before I learned to read the soil, not the calendar. In my tropical climate the aloe actually needs water more often than people expect, but it's still the dryness check that matters. Once you stop treating it like a houseplant that needs constant attention, the plant thrives and you get better gel yield. That shift from routine to observation probably saved your plant.
I've been wanting to try aloe vera since I keep reading about how useful the gel is, but I'm worried about overwatering it in my cold climate where everything stays pretty damp. Does aloe do okay in lower humidity, or would I need to be extra careful with the soil mix to make sure it drains well enough?
I've had mixed results with aloe over the years—my first one rotted from overwatering before I learned that "lean" really means lean in my cold climate. Now I keep mine on a south-facing shelf where it stays drier longer, and the difference in leaf plumpness is noticeable. The gel is genuinely useful for minor burns, though I've found harvesting outer leaves regularly encourages bushier growth rather than just pulling from the center. Do you find that propagation success varies much with leaf size, or is it fairly reliable once you nail the moisture balance?
I've got a single aloe plant that's been sitting on my windowsill for a few months now, and honestly I'm still figuring out the watering part—I keep second-guessing myself on how often to actually water it. Your guide sounds like exactly what I need, especially the harvesting section since I haven't tried using the gel yet. Really appreciate posts like this that go into the practical stuff.
I killed my first aloe by watering it like it was a needy friend, so I really appreciate you emphasizing the "lean watering" part—it's genuinely the make-or-break step for most people. Mine finally thrived once I switched to a gritty soil mix and basically forgot about it for weeks at a time. Now I've got three happy aloes in my collection, and I actually use the gel, which makes keeping them feel less like a hobby and more like having a tiny medicine cabinet on my windowsill.
I appreciate you diving into the practical side of aloe care—so many people overwater theirs and end up with mushy rosettes. Since I'm in a tropical climate, I've found that my aloe actually thrives with slightly more frequent watering than the typical "neglect it" advice suggests, though the soil drainage remains absolutely critical. Have you noticed the watering needs shifting seasonally where you are, or do you keep yours on a pretty consistent schedule year-round?
I've got three *Aloe barbadensis* in my collection, and they've genuinely become my most low-maintenance performers—honestly, I neglect them more than my other succulents and they seem to appreciate it. The key I've noticed is getting the soil mix right; I use roughly 60% gritty sand with standard potting mix because even "succulent soil" from stores tends to retain too much moisture in a tropical climate like mine. The gel harvesting is satisfying once the leaves are mature enough, though I've learned the hard way that taking too many leaves too soon weakens the plant.
I appreciate the focus on practical uses—so many care guides skip the harvesting part. My aloe has been thriving in a bright corner for years, though I'll admit the arid climate here makes it almost forgiving. The lean watering advice is key; I see a lot of people kill theirs with kindness. Did you find any particular soil amendment works best, or does standard cactus mix do the trick?
I've had my aloe tucked in a sunny corner for years, and honestly the biggest game-changer for me was ditching regular potting soil entirely—I switched to a cactus mix with extra perlite, and my leaves went from shriveling to actually plump within weeks. The lean watering part is so true, especially in winter when I basically forget about mine for months. Are you growing yours from pups, or did you start from a mature plant?
I'm so glad you mentioned the soil swap—I've been struggling with soggy leaves on my aloe and I think that's exactly my problem! I'm definitely going to grab some cactus mix with extra perlite this week. Mine started as a small pup from a friend's plant about two years ago, and it's slowly getting bigger, though I admit I'm still nervous about when to actually harvest gel without killing it. Have you found a good way to tell when a leaf is mature enough?
I appreciate the focus on lean watering, though I'd push back slightly on "bright light" being enough—mine genuinely struggled until I moved it to direct sun. That said, the practical angle is refreshing since most guides gloss over how much aloe actually needs to thrive rather than just survive indoors. Curious whether your harvesting recommendations account for leaf maturity, since I've found premature cutting leads to disappointing gel yield.
You're spot on about the direct sun—I've found the same thing in my tropical setup. Bright indirect light keeps aloe alive, but it won't thicken up the leaves properly without at least a few hours of genuine direct rays. On the maturity angle, I'd agree it matters; I waited until leaves were visibly plump and the plant was a few years established before harvesting, and the gel quality was noticeably better than when I got impatient. The post seems to assume people know this intuitively, but it's worth spelling out.
I've had my aloe for about two years now and it's honestly one of my easiest plants—I think I've actually under-watered it more than over-watered, which is the opposite of my track record with everything else. I'm curious about the harvesting part since I haven't tried that yet; do you recommend waiting until the plant reaches a certain size before you start taking leaves, or can you harvest from younger plants too?
I keep a single aloe in a terracotta pot and it's genuinely one of the easiest plants I've ever grown. The one thing I'd add is that if you're in a Mediterranean climate like mine, you can actually let it dry out completely between waterings in winter—I've found mine thrives on that kind of neglect during the cooler months. Great to see a guide that focuses on the practical side rather than just the aesthetics.
I completely agree about the seasonal shift—I've noticed the same thing with my *Aloe barbadensis* in the tropics, though the dynamic plays out differently here since we don't really have a true winter. Mine actually slows down during the wet season, so I deliberately back off watering then to prevent root rot. Terracotta is definitely the right call; it lets that soil dry faster than anything else, which these succulents really appreciate.
I've been trying to get my aloe to produce thicker leaves like the ones in photos online, so I'm curious whether you'd recommend repotting into something larger or if that might actually discourage the plump growth? Mine's been stuck in the same pot for about a year and I'm wondering if I'm overcomplicating it—it seems like such a low-maintenance plant but I still manage to second-guess myself on the basics.
I totally get the second-guessing—I have an orchid that's been in the same pot for two years while I convinced myself it needed upsizing, and it turns out it was just thirsty for neglect! With aloe, I'd honestly leave yours put if it's not bursting roots; mine got plumper once I stopped fussing and just let it dry out completely between waterings. If you do repot, snug soil (not loose) seems to encourage that satisfying firmness more than extra space does.
I've got to push back a little here—aloe vera has never thrived for me in my cold climate, even indoors under lights. The real challenge I've hit is humidity and that perpetual damp-basement air, no matter how lean I keep the watering. I'm curious whether you've had success growing it long-term in a genuinely cool region, or if this guide assumes a warmer setup?
That's a really valid point—I'm actually dealing with something similar in my dry climate, just the opposite problem. My aloe does great with the low humidity, but I've always wondered if the cold would be harder on it than anything else. Do you think the issue is specifically the temperature, or is it more that the combo of cold plus that basement moisture is just too much? I'm curious if you've tried moving it to a warmer spot in your house, like near a south-facing window or on a heat mat or something?
I've got three aloe plants going right now, and honestly the biggest game-changer for me was switching to a gritty cactus mix with extra perlite—the standard stuff holds too much moisture in my dry climate, even for a succulent. Mine really took off once I stopped overthinking the watering. Are you finding that people tend to overwater more than anything else, or do you run into other common issues when folks write in about struggling plants?
I've killed more aloe veras than I'd like to admit by watering them like normal plants—they genuinely prefer neglect. What finally worked for me was repotting into terracotta with added perlite and only watering when the soil was bone dry, which in my mediterranean climate means maybe every 3–4 weeks in winter and twice that in summer. The gel harvest tip is solid too; I've found the outer leaves are the most concentrated. Do you find the plants need any adjustment if they're started indoors versus getting strong sun from the beginning?
I've had *Aloe barbadensis* in my collection for years now, and the key really is nailing the watering schedule—I treat mine almost like a neglect experiment and it thrives. If you're growing it in mediterranean conditions like I do, the well-draining soil becomes even more critical since you're already fighting humidity. I'd love to share a photo of my specimen's offset pups if there were upload options here, since propagation from those is genuinely foolproof compared to leaf cuttings.
I've had mixed luck with aloe over the years—turns out my instinct to "help" with extra water was exactly the opposite of what they wanted! Switched to a gritty potting mix and barely touch the watering can now, and they've thrived. Would love to know your take on whether the gel-producing varieties need different light than the ornamental ones, since I've noticed my variegated one seems less vigorous even in the same bright spot as my green aloe.
I've killed more aloe plants than I'd like to admit by overwatering them in my cold climate—turns out they really do need that "lean" approach you mention, especially over winter when they're basically dormant. My breakthrough came when I switched to a terracotta pot with cactus soil and now I only water mine every three weeks or so. What's your take on the gel harvesting—do you wait until the leaves are really thick, or do you harvest on a schedule?
I totally get that—overwatering is such an easy trap when you're used to tending tropical plants like my orchids! Your terracotta + cactus soil combo sounds spot-on, and three weeks sounds about right depending on your humidity. I tend to harvest when a leaf reaches decent thickness rather than sticking to a schedule, since my aloe seems to grow in spurts. Do you find the terracotta dries out faster in your climate, or was it more about preventing that moisture buildup in the soil itself?
I really appreciate you sharing that—overwatering is definitely my biggest struggle too, especially since my winters are so cold. Your terracotta and cactus soil setup sounds like exactly what I need to try. I'm curious about the gel harvesting question you asked, since I have four small plants and I'm not sure if I should be harvesting at all yet or wait until they're more established. Do you find that harvesting actually encourages more growth, or does it just feel nice to actually use the plant for something?
I appreciate the focus on practical use here—too many care guides treat aloe like a decorative houseplant and skip the harvesting part. I've found *Aloe barbadensis* thrives on neglect in my cold climate, but the real challenge is resisting the urge to water during winter dormancy when it looks shriveled. Do you have recommendations for when it's actually safe to harvest leaves without stressing a younger plant, or is there a size threshold you recommend waiting for?
I totally get the winter dormancy thing—that shriveled look is so deceptive! For *Aloe barbadensis*, I'd wait until the plant has at least a dozen mature leaves from the base before harvesting; younger rosettes just don't have the reserves. I've found the outer leaves are safest to take first since they're the oldest, and honestly, if you're ever unsure, one leaf won't hurt. Does your cold climate setup stay completely dry in winter, or do you give it even a minimal drink?
I've got three aloe plants scattered around my kitchen, and I'd honestly say they're more forgiving than most people think—though I do see them rot pretty often in people's collections. My one thing: I keep mine in a pot with drainage holes and let the soil dry out completely between waterings, sometimes going weeks. Are you finding that people tend to overwater them, or is the issue more about pot choice in your experience?
I think you're hitting on both! In my arid climate, I've actually had better luck with aloe than with my orchids (which are definitely my struggle zone), but I've watched friends in humid areas kill theirs with kindness—they see the wrinkled leaves and water instead of waiting it out. The drainage hole thing is huge though; I've got fourteen plants now and learned that lesson the expensive way with a few rotted rosettes before I figured it out.
I've had my aloe for two years now and the biggest game-changer was switching to a pot with drainage holes and letting the soil dry out completely between waterings—I was overwatering at first and the leaves just got mushy. The practical uses are great too, but I'd add that harvesting older outer leaves keeps the plant looking tidy and encourages fuller growth.
That drainage hole tip is gold—I learned the same lesson the messy way with my first aloe! Mine sits in my Mediterranean kitchen where it gets tons of natural light, and honestly once I stopped fussing with it, the plant just thrived. Do you find the gel production gets noticeably better once the plant is healthier, or was that not something you tracked?
I'd actually argue aloe's biggest weakness is overwatering—I killed my first one by treating it like my other houseplants, but once I switched to watering maybe once a month and let the soil dry completely, it thrived. The gel harvesting tip is solid too; I've been cutting outer leaves as needed rather than waiting for some perfect moment, and it's kept my plant producing for years without stress.
I really appreciate you sharing that—I've been nervous about my own aloe since I tend to underwater everything else, so hearing it actually *wants* to dry out completely is reassuring. Did you find that the soil type matters much, or is the watering schedule really the main thing? I'm growing mine in regular potting mix right now and wondering if I should switch to something grittier like cactus soil.
I've been meaning to try aloe vera since I only have an orchid right now and want something lower maintenance. Quick question though—when you say "lean watering," does that mean once a month in a temperate climate, or should I wait until the soil is totally dry? I'd love to see a photo of yours if you have one showing what healthy plump leaves actually look like, since I'm still learning what "thriving" looks like versus just surviving.
I've kept aloe for years now, and I have to say it's genuinely one of the easiest plants I own—though I do think the "lean watering" advice deserves emphasis since I've seen more aloe killed by overwatering than anything else. Mine actually thrives in my cold climate as long as I keep it bone dry in winter and resist the urge to fuss with it. Have you found that indoor aloe tends to stay more compact than outdoor plants, or does it still get leggy for you even with strong light?
I totally agree about the overwatering trap—I've definitely learned that the hard way! My one aloe (Aloe barbadensis) actually stayed pretty compact indoors even before I figured out the watering rhythm, but I think that's partly because I keep it in a south-facing window and it doesn't have the space to stretch. I'm curious whether you've noticed yours getting lankier if you ever move it further from the light, or does it pretty much stay stocky no matter what?
I'd push back slightly on "indoors" being ideal—I've found *Aloe barbadensis* thrives much better on a bright, unobstructed south-facing windowsill in my arid climate, or honestly outdoors year-round here. The gel quality seems noticeably better when the plant gets that intense light stress. That said, your point on lean watering is spot-on; I see most failures stem from overwatering in an attempt to be generous rather than the reverse.
You're absolutely right about the light—I've noticed the same thing with mine on my south-facing sill in a temperate climate. The gel does seem richer when they're really stressed! Though I have to keep mine indoors year-round because of winters here, so I'm curious whether you've found the winter dormancy period affects gel production at all, or if your outdoor plants just stay equally robust through the season?
That's a sharp observation about light intensity—you're right that *A. barbadensis* responds visibly to full sun stress, and I suspect the increased gel concentration you're noticing reflects genuine physiological adaptation rather than just appearance. I keep mine in a south-facing spot too, though I'm cautious about sudden exposure shifts in spring. Your point on overwatering as the real culprit resonates; I've found most people underestimate how drought-adapted these are.
I've had an aloe for about three years now and honestly it's taught me more about "less is more" than any other plant I own—I used to overwater it like crazy until the leaves got mushy and translucent. Now I barely water it, let it sit in the sunniest spot I can find, and it's never been happier. Do you find that most people struggle more with the watering or the light part when starting out?
I've killed more aloe plants than I'd like to admit by overwatering them, so I really appreciate how clearly you've laid out the watering guidelines. I kept mine on a tropical schedule at first, which was a disaster—now I treat them like the drought-lovers they are and they're finally thriving. The harvesting tips are going to be helpful for me too, since I've got three mature plants but wasn't sure about the best way to use the gel without stressing them out.
Overwatering is such a trap—I drowned my first aloe within weeks, so I totally get it! Now I let mine dry out completely between waterings and they're so much happier. The gel harvesting is satisfying once you know you're not hurting them; I usually just snap off an outer leaf when I need some, and my plants have never seemed bothered by it.
I've been growing aloe for about a year now and didn't realize I could actually harvest the gel until I read this. Mine sits on my windowsill with my other succulents and seems happy enough, but I'm curious—do you need to wait until the plant reaches a certain size before you start taking leaves, or can you harvest from younger plants too?
I appreciate how you've emphasized the lean watering—so many people kill their aloe by treating it like a tropical plant instead of a succulent. I've found that in my arid climate, I actually water mine even less than most guides suggest, maybe once a month in winter. Have you noticed differences in gel quality or leaf plumpness depending on how much light your aloe gets, or does it stay pretty consistent as long as it's bright enough?
Light definitely makes a difference—I've noticed my aloe gets noticeably plumper and more vibrant green under my brightest south-facing window versus when I had it further back. The gel seems richer too, though I haven't done a rigorous comparison. Your once-a-month winter schedule sounds spot on for an arid climate; I'm in a temperate zone and do something similar, so it really does depend on humidity and evaporation rates. Do you find the leaves stay firm longer between waterings, or is it more about preventing rot altogether?
I'll be honest—I've killed far more succulents than I've kept alive, mostly by overwatering out of misplaced kindness. That said, my one success has been following the "neglect strategy" with *Aloe barbadensis*, which seems to thrive on my tendency to forget it exists for weeks at a stretch. I'm curious whether your soil recommendations lean toward pure grit or if you blend in a bit of compost; my arid climate dries things out so quickly that I've wondered if I'm being too extreme with inert substrate.
I've found aloe to be surprisingly forgiving once you commit to that lean watering approach—my specimens have thrived on a mediterranean windowsill with minimal fussing. The gel harvesting bit is what really sells people on keeping them though, especially since it's so satisfying to have a remedy literally growing on your shelf. Are you finding particular leaf sizes work best for gel extraction, or does maturity matter more than length?
I've been wanting to try aloe vera for ages since I keep hearing about the gel uses, but I'm worried about overwatering it—do you find it actually needs less water than most of my other plants, or does it just feel that way because it's a succulent? I'm in a cold climate so I'm also curious whether it does okay as a year-round indoor plant or if it struggles during winter.
I appreciate the focus on lean watering—that's where most people stumble with *Aloe barbadensis*. In my arid climate, I've found that letting the soil dry out completely between waterings actually encourages better gel production than the overly cautious approach some guides suggest. My aloe sits in a west-facing window and barely needs water during winter, which seems counterintuitive until you remember these are adapted to drought. Curious whether your guide emphasizes that patience with watering?
I appreciate the practical focus here—aloe really does thrive on neglect, which makes it perfect for anyone building confidence with houseplants. Though I should mention that in my tropical climate, I've found *Aloe barbadensis* actually prefers slightly more consistent moisture than the typical desert succulent advice suggests, especially during rainy season. Have you noticed differences in watering needs depending on where your readers are growing their plants?
I've had my aloe for about 8 months now and it's finally starting to look decent—took me way too long to figure out it actually needs *less* water than I was giving it. I'd love to try harvesting some gel soon, but I'm still a bit nervous about cutting into it. Does it bounce back quickly after you take leaves, or should I wait until it's bigger? I have a photo of mine that's looking way healthier now, would be good to compare notes.
I've kept aloe (Aloe barbadensis) for years and found it surprisingly fussy about one thing: drainage. Even though everyone says succulents are forgiving, I killed my first plant with standard potting mix that held too much moisture in winter. Switching to a cactus mix with extra perlite made all the difference—now mine thrives on neglect. Did you find certain soil amendments worked better than others in your experience?
I've found that *Aloe barbadensis* really thrives when you treat it almost with benign neglect—I keep mine in a gritty cactus mix and water maybe once a month, even less in winter. The gel quality improves noticeably when the plant is slightly stressed by dryness rather than overwatered, which seems counterintuitive to most people. Looking forward to seeing how you cover propagation, since my offset babies have been some of the easiest plants to establish from my collection of eleven.
I've learned the hard way that aloe really does hate soggy soil—I killed my first one by watering it like a normal houseplant! Now I use a pot with drainage and barely water during winter, and it's thriving on my sunny windowsill. Have you found that propagation from leaves works reliably, or do you prefer waiting for pups to harvest from the mother plant?
I've killed more aloe than I care to admit by watering too generously—they really do need that lean treatment even in humid tropical climates. My breakthrough came when I switched to a chunky, fast-draining mix (I use orchid bark mixed into cactus soil) and only water when the leaves start to look slightly thin, which for me is about every 3–4 weeks. The gel production is noticeably better now too.
I appreciate how straightforward you've made this—aloe really does thrive on neglect in the right setup. I keep mine in a gritty, fast-draining mix and only water when the soil is completely dry, which works beautifully in my arid climate. Have you found that the gel quality improves with plant maturity, or does a younger rosette produce just as potent results for topical use?
I've killed exactly two aloe veras through overwatering before I realized they genuinely *want* to be neglected—now my third one is finally thriving on a sunny shelf with barely any attention! I'm curious though: once you harvest gel from a leaf, does that leaf ever recover, or is it basically done for good?
The leaf won't recover once you've harvested the gel—it's essentially done for good, since you're removing the tissue that stores those useful compounds. I learned this the hard way with my *Aloe barbadensis* a few years back; I was too cautious about harvesting and ended up with a plant that looked depleted anyway. Now I just harvest from the outer, mature leaves and let the plant keep putting energy into new growth rather than trying to "nurse" damaged ones back.
I've had *Aloe barbadensis* in my collection for years, and the gel production really does depend on getting the light and drainage right—mine sits in a south-facing window with gritty cactus mix, and the leaves stay visibly turgid year-round. The lean watering approach you describe is spot-on; I see too many people kill their plants with kindness, especially in humid climates like mine. Curious whether you recommend any particular harvest frequency to keep the plant vigorous.
I've had mixed luck with aloe over the years—killed my first one by watering it like a regular houseplant, which was a hard lesson! Now I keep mine in a sunny corner with the other succulents and basically ignore it, and it's thriving. The practical uses are what really won me over though; I've started harvesting gel for minor burns in the kitchen, which beats keeping ointment around. Do you find that the gel potency changes depending on how mature the leaves are?
Good question about leaf maturity—I'd say yes, the outer, older leaves tend to have more concentrated gel and are honestly easier to harvest without stressing the plant. I've noticed mine (Aloe barbadensis, the true medicinal type) produces the thickest leaves when it's had a really dry winter, almost dormant. Have you experimented with letting yours dry out more between waterings during the cooler months, or do you water year-round?
I've got an orchid that's been struggling, so I'm thinking about diversifying—my place stays pretty temperate and I'm honestly tired of fussing with humidity. Does aloe really need as little water as people say, or is that one of those things that varies a lot? I'd probably kill it if I watered it like my orchid, so I want to make sure I'm not overthinking it before I pick one up.
I've been wanting to grow aloe for its gel but kept killing mine with too much water—this is really helpful. I do wonder though if "lean watering" means something different in your climate versus mine, since my Mediterranean summers get so dry that I'm wondering if I should adjust the schedule seasonally rather than using one approach year-round. Are there signs I should watch for that tell me when my plant actually needs water versus when I'm just guessing.
I totally get that confusion—I'm in a tropical climate and I've noticed my *Aloe barbadensis* needs water more often than guides suggest, especially during wet season. I've started checking the soil about an inch down with my finger; if it's completely dry and the leaves feel slightly less firm than usual, that's my cue to water. Your seasonal adjustment idea makes a lot of sense though, and I'd be curious if you find summer dormancy actually applies where you are, since that's so different from what I experience here.
I've kept aloe for years and honestly the biggest difference for me was ditching regular potting soil entirely—I use cactus mix with extra perlite, and it's cut my failures from overwatering down to zero. The gel harvest timing matters too; I only take outer leaves once they're truly mature and plump, which means waiting longer than most people think but getting way better results. Propagation from pups works better for me than leaf cuttings, so if your guide covers both, that's solid.
I'm with you on the soil—that extra perlite is non-negotiable for me too, especially in my mediterranean climate where it's already warm. The patience thing on harvesting really resonates; I burned out a plant early by being too aggressive, and now I wait until those leaves are genuinely fat and heavy. Do you find pups root faster than leaf cuttings, or is it just that they're more reliable overall?
I've killed more aloe through overwatering than I care to admit, so I really appreciate the emphasis on lean watering! My turning point came when I switched to a gritty cactus mix and started letting the soil dry out completely between waterings—now my plants actually look like the ones in the photos. The gel production is honestly a nice bonus; I mostly just enjoy watching them slowly multiply on my sunny windowsill.
I've got three aloe plants going right now and honestly the lean watering part is what finally clicked for me—I was overwatering mine before and they got all mushy. My question is about the gel harvesting though: does it actually regenerate on the same leaf after you've cut it, or do I need to keep rotating to fresh leaves?
I had the same issue with overwatering before I learned that lesson. On the gel regeneration—unfortunately you can't get more from the same leaf after harvesting, so you do need to rotate to fresh ones. The good news is that a mature aloe grows new leaves pretty steadily, so you'll have plenty to work with if you're not harvesting too aggressively. I've found spacing out my harvests keeps the plant looking full while still giving me gel when I need it.
I'm glad that worked out for you—I killed my first aloe the exact same way! From what I've learned, the gel doesn't really regenerate on the same leaf after you harvest it, so rotating to fresh outer leaves is definitely the way to go. I just harvest from the bottom leaves as they get plump enough, and it keeps the plant looking balanced while giving you fresh gel. Your three plants will keep you plenty supplied!
I killed my first aloe by drowning it in good intentions—turns out "lean watering" really means *lean*! I've since learned that my cold climate makes it even trickier since the soil dries slower indoors, so I basically water mine every three weeks and call it a win. The gel harvest tip is what finally made me understand why people keep these around beyond the aesthetics. How often do you find yourself actually using the gel versus just admiring the plant?
I've killed more aloe plants than I'd like to admit before learning they actually *hate* my tendency to fuss! I finally got one to thrive by basically ignoring it—just bright windowsill, water maybe once a month, and it's become genuinely useful when I get kitchen burns. Since I garden in a Mediterranean climate, the heat helps too. Have you found that people tend to overwater these more than anything else, or does it depend on their setup?
I've had good success with aloe, though I'll admit it took me a while to stop overwatering mine! The one thing I'd add is that if you're in a mediterranean climate like I am, you can actually get away with leaving them outside during warmer months—mine tripled in size once I moved it to a shadier corner of my courtyard. Have you found that outdoor light makes a real difference in gel production, or is that just my experience?
I've been wanting to grow aloe vera for a while now—I have nine plants total, mostly natives that do okay in my arid climate, but I haven't tried aloe indoors yet. Does it really need that much bright light, or can it handle a typical sunny windowsill? I'm also curious about the harvesting part since I keep seeing people mention using the gel, but I'm not sure when it's actually ready to use.
I'd say a typical sunny windowsill should be fine for aloe—mine does well on a south-facing one, though it does stretch a bit if the light dips. The key is avoiding wet soil more than anything. As for harvesting, I wait until the leaves are nice and thick (usually a few years in), then snap off an outer leaf and let it drain upright for a day before squeezing the gel out. Have you found aloe does better indoors or outdoors in your climate, or are you hoping to keep it inside for convenience?
I appreciate the emphasis on lean watering—that's honestly where most people slip up with *Aloe barbadensis*. I keep mine in a bright south-facing spot and only water every three weeks or so, and the leaves stay wonderfully plump. Do you find that gritty soil mix makes as much difference as people claim, or is it more about nailing the watering schedule? I've been thinking about propagating some leaf offsets this spring if mine cooperates.
I'd say the gritty mix matters, but you're right that watering is the real linchpin—I've seen *Aloe barbadensis* survive in mediocre soil with disciplined watering, but fail in perfect substrate when overwatered. That said, I use a 60/40 cactus mix to perlite ratio and find it gives me a real margin for error, which matters when I'm juggling 11 plants with varying needs. For spring propagation, leaf offsets root surprisingly reliably if you let the cut end callus for a few days before laying them on dry soil—I had good success with mine last year.
I've killed more aloe plants through overwatering than I'd like to admit, so I'm glad you're emphasizing the lean watering approach—it really does make the difference between plump leaves and a mushy mess. One thing that finally worked for me was repotting into a terracotta pot with extra perlite mixed into the soil, which dried things out faster and forced me to be honest about how infrequently aloe actually needs water. It's not the most glamorous plant care tip, but it transformed mine from sad and translucent to genuinely thriving.
The terracotta + perlite combo really is a game-changer—it removes the guesswork that gets most people. I've found the same thing with my *Aloe barbadensis*, though I've also had good success with a gritty cactus mix straight out of the bag if someone wants to skip the amendment step. That translucent look you mentioned is such a telling sign of root rot setting in; catching it before the mushy stage is half the battle.
I've had my aloe for about eight months now and it's finally starting to look plump instead of thin and stretched—I think mine was desperate for more light before I moved it closer to my south-facing window. I'm still figuring out the watering schedule though; does the soil need to dry out completely between waterings, or is there a point where it's just *mostly* dry? I want to try harvesting some gel soon but I'm worried about damaging the plant.
I've had my aloe for about two years now, and the biggest thing that changed my success was switching to a pot with drainage holes and letting the soil dry out completely between waterings. I was overwatering it early on thinking I was being helpful, but once I scaled back it really took off. Looking forward to reading more about the propagation side since I've got some pups starting to show.
I appreciate the practical angle here, though I'd push back gently on "rewarding" for cold climates—mine's been temperamental in winter no matter what I do with the watering schedule. That said, the lean watering part is spot-on; I learned that the hard way after killing my first one. Are you finding that harvesting leaves (beyond just the gel) affects regrowth, or do you treat it more as a hands-off plant?
I've kept aloe for three years now and the biggest shift for me was ditching the "water weekly" habit—mine sat in bone-dry soil for weeks at a time and finally started thriving. The gel harvest tip would've saved me from a lot of mushy leaves early on. If I could upload a photo I'd show my current one; the leaves are genuinely plump for the first time.
I've had mixed success with aloe over the years—my first one rotted within months because I was too generous with water, which felt like a betrayal of the whole "low-maintenance succulent" promise! The real game-changer for me was switching to a much grittier soil mix with extra perlite, almost like what I use for my rosemary. Now mine actually stays plump instead of shriveling, and I can harvest without guilt.
I've only got the one aloe (Aloe barbadensis, technically), but it's honestly been my easiest plant to keep alive—which is saying something since I usually overwater everything! The gel extraction bit really interests me though; I've read conflicting stuff about whether harvesting outer leaves actually stimulates growth or just weakens the plant. Have you found one approach works better than others for keeping them productive long-term?
I've learned the hard way that light matters way more than people think with aloe—mine stayed pretty stubborn until I moved it closer to a south-facing window, and *then* the outer leaves got thick enough to harvest without guilt. I tend to only take the mature outer ones and leave the center untouched, which seems to keep mine happy and productive. Your experience with overwatering resonates; I think that's actually what makes aloe so forgiving, since the real killer is sitting in damp soil rather than occasional neglect.
I've got just one potted *Aloe barbadensis* in my little mediterranean collection, and honestly it's been the easiest plant I own—barely looks at me most weeks! My question is whether you've found any difference in gel quality or potency between plants grown super dry versus those watered a bit more generously? I keep mine almost bone-dry, but I'm curious if that's actually affecting the usable harvest, or if it's more about light and maturity. Would love to know what your experience has been!
I've definitely noticed my aloe leaves feel plumper and more gel-filled when I've been a bit less stingy with water—though I learned that lesson the hard way by nearly mummifying one of mine! That said, I think you're right that light matters more; my best harvests have come from the plants sitting in my brightest window, regardless of watering approach. Have you noticed a difference in leaf thickness between your bone-dry aloe and any others you might know of?
I've had my aloe for three years and the single biggest shift was stopping the urge to water it—mine actually thrives on neglect in a bright west-facing window. The gel quality noticeably improved once I stopped fussing, so I'm curious whether you've noticed the same correlation between sparse watering and leaf thickness, or if that's just been my particular setup?
I totally get what you mean about the neglect approach. I learned that lesson with mine too—I was watering mine weekly at first and they were just sitting there sulking. Once I switched to the "forget about it until the soil is bone dry" method, the leaves filled out so much faster and the gel became thicker and clearer. I think sparse watering really does push them to store more reserves, so your setup isn't unusual at all.
I've been meaning to try aloe vera for ages since everyone raves about the gel, but I was worried I'd kill it with kindness—turns out that's probably my biggest risk. Do you find the gel stays useful after harvest, or does it degrade quickly once you cut the leaves?
I've had mixed success with aloe over the years—my first plant rotted from overwatering before I learned that "lean" really means lean. Now I keep mine in a shallow pot with extra perlite mixed into cactus soil, and it thrives on neglect. The gel harvest is genuinely useful for minor burns, though I wish I'd known earlier that the yellow latex just underneath the skin can irritate sensitive skin. Do you find the plant's water needs change much between seasons, or do you stick with the same sparse schedule year-round?
I totally get the overwatering trap—I killed my first aloe the same way! Your perlite mix sounds smart; I do something similar and honestly, I barely water mine through winter at all, maybe once every 6–8 weeks. In growing season I'm a bit more generous, but still sparse compared to other plants. And thanks for the heads-up about the latex irritation; I've never had sensitivity issues with it, but that's really useful to know—do you just rinse the gel thoroughly before using it, or do you scoop it out more carefully?
I've kept my aloe vera on a bright west-facing shelf for about two years now, and the best thing I learned was to let it dry out completely between waterings—I was way too generous at first and nearly lost it to root rot. Once I switched to a lean watering schedule, it took off and I finally got those plump leaves the post mentions. Great to see harvesting and propagation covered since those are the parts that make aloe so practical to have around.
That west-facing spot sounds perfect—I bet it gets intense afternoon light. Root rot is such a common pitfall with aloe, and I'm glad you caught yours in time. I'm curious whether you've noticed any difference in how often you need to water during your cold season versus summer, or does yours pretty much stay on the same lean schedule year-round?
I've had mixed results with aloe in my arid climate—they thrive once you stop fussing with them, but I've definitely overwatered mine early on. The gel harvest tip is what finally got me to commit to keeping one around, since having that on hand for minor burns actually justified the shelf space. My only pushback is that "lean watering" can mean very different things depending on whether someone's in a desert versus somewhere humid, so I'm curious how you'd adjust the frequency for different climates?
I've had great success with Aloe barbadensis in my Mediterranean setup, though I have to admit it's one of the few succulents that actually prefers slightly more water than my typical regime. The gel extraction part is what really got me—I hadn't realized how much of a difference harvest timing makes for the potency. Do you find the propagation from leaves works better in your climate than stem cuttings, or does it depend more on the season?
I'd gently push back on aloe vera being particularly "rewarding" indoors—it really thrives in bright, dry conditions that most homes struggle to provide, especially if you're used to humidity-loving plants like I am with my orchids. That said, your point about lean watering is spot-on; I've seen far more aloe killed by well-meaning overwatering than by neglect. The propagation angle is solid too, since leaf cuttings are genuinely forgiving if you let them callus properly first.
You make a fair point about the indoor light thing—I've definitely had better luck with mine on a south-facing windowsill than anywhere else in my flat. Though I will say, if someone's already got herbs thriving in bright conditions, aloe slots in pretty nicely alongside them with basically zero extra fussing. But yeah, the callusing step before propagating is crucial; I learned that the hard way and lost a few leaves before I got the patience for it!
I appreciate this practical breakdown, especially the emphasis on lean watering—aloe is so forgiving when you let it dry out completely, but people often err on the side of caution. I'm curious whether you've found a preferred propagation method in your experience; I know leaf cuttings work, but I've had better success with offsets from the base.
I've been wanting to grow aloe vera for ages since I keep hearing about the gel uses, but I'm nervous about overwatering—my place is pretty dry and I tend to water everything the same way out of habit. Does aloe actually do better in arid climates like mine, or does that dryness indoors still risk root rot if I mess up the watering schedule?
I've been meaning to get my watering schedule right for my aloe—I tend to overwater everything—so this is really helpful. I'm curious though: does the soil composition matter as much for *Aloe barbadensis* as it does for other succulents, or is it more forgiving? I have one that's doing okay in regular potting mix, but I'm wondering if switching to cactus soil would actually make a noticeable difference, especially in my tropical humidity.
I've had my aloe for about eight months now and it's doing well, but I'm still figuring out the watering—I live in a Mediterranean climate so it's pretty dry here, which I think helps. My main question is: when you harvest the gel, does it actually regrow the leaf or is that leaf done for? I'd love to use it but I don't want to mess up the plant. I have a photo of mine if I could upload it, since the leaves are getting pretty thick lately.
I've kept aloe for years in my dry climate, and honestly the biggest game-changer for me was switching to a terracotta pot—it dries out fast enough that I barely think about watering. Mine's one of only three plants I actually have room for, so it's gotta earn its place, and the gel for sunburns definitely justifies it. Did you find any particular propagation method worked better than others, or do you just go with whatever leaves fall off naturally?
I really appreciate the practical focus here. One thing I'd gently push back on though: "lean watering" can mean different things depending on climate and pot drainage. In my arid setup, my *Aloe barbadensis* actually thrives on even sparser watering than most guides suggest—sometimes I go 4–5 weeks between waterings in winter. The key seems to be pairing that restraint with gritty, fast-draining soil rather than just following a fixed schedule. Curious if your experience aligns with that.
I appreciate the practical focus here. While I'm admittedly more comfortable with orchids in my arid climate, I've found that the same light-first philosophy applies to Aloe barbadensis—bright indirect is really the non-negotiable. My one question for readers: are you harvesting gel for actual use, or mostly keeping them as low-maintenance houseplants?
I've killed exactly one aloe in my eight years of plant keeping—overwatered it like it was a tropical fern, which... is not the vibe. Now mine sits in a bright south window and basically ignores me, which is exactly what I deserve. I'm curious whether you recommend harvesting from the outer leaves first, or does it matter much as long as you leave the center rosette intact?
I'd actually gently push back on the "indoors" part—Aloe barbadensis really thrives for me in a Mediterranean climate where I can give it unfiltered sun and let the winter rains do most of the work. I've found mine get leggy and weak indoors even with a grow light. Are you growing yours on a bright windowsill, or have you had better luck with consistent artificial light?
I killed my first aloe by overwatering (classic beginner move), but now that I've got the hang of treating it like the desert plant it is, it's honestly the easiest of my thirteen plants to keep happy. The gel harvesting tip is gold—I always felt weird cutting into it until I realized the plant actually bounces back better for it!
I've got to be honest—aloe thrives so well for me that I almost feel guilty! Though I'm in a pretty cold climate, so I keep mine on a south-facing shelf year-round and barely water it. My one tip: don't use standard potting soil like I did at first. Switching to a gritty cactus mix made a huge difference in preventing rot. Have you found that certain soil amendments work better than others for your readers, or does basic succulent mix do the job?
I'd push back slightly on aloe being "rewarding" indoors—mine does fine on a shelf, but it never gets that vigorous density you see in warmer climates. The lean watering advice is spot on though; I've killed more aloe with good intentions than neglect. One thing I'd add: if you're actually harvesting gel regularly, it's worth rotating which leaves you take so the plant doesn't get lopsided.
You're absolutely right about the density issue—*Aloe barbadensis* just doesn't have the vigor indoors that it gets in Mediterranean or arid climates, even with supplemental light. And that rotation tip is solid; I've noticed the same thing with my mature plant, where harvesting from one side eventually creates an awkward lean. The gel yield per leaf is modest indoors anyway, so being thoughtful about which ones you take keeps the whole plant looking balanced and healthy.
I've had mixed results with aloe indoors — mine eventually got leggy despite decent light, so I moved it outside to my patio where it thrives. The lean watering advice is spot-on; I killed my first one by fussing with it. Are you growing yours indoors year-round, or do you find it does better with seasonal outdoor time in a mediterranean climate?
I've had the same leggy problem indoors even with a south-facing window—I think aloe just wants more light intensity than most homes can provide. These days I keep mine on a bright shelf in summer and move it outside when possible, which seems to reset the growth habit. The lean watering definitely requires restraint; I water mine only when the soil is completely dry and the leaves look slightly wrinkled, which in winter might be just once a month.
I've had decent success with aloe, though I'll admit it took me a while to stop overwatering—that was my main mistake when I first started. The gel harvesting section sounds really useful since I mostly just leave mine alone in a corner. One thing I'm curious about: do you find that aloe actually thrives in cold climates, or is it more of a "tolerate it indoors" situation? I'm in zone 5 and mine survives fine as a houseplant, but I wonder if I'm missing out on the growth potential people get in warmer areas.
I'd love to see your thoughts on winter watering—that's where I see most people run into trouble with aloe, especially in my mediterranean climate where the indoor heating dries everything out. I keep mine on a shelf by a south-facing window and barely water from November through February, but I'm curious if you adjust your schedule depending on the season or if consistency works better in your space?
I've had mixed luck with aloe—mine tend to get leggy and sad in my tropical humidity, so I'm always jealous of people who nail the "lean watering" part! That said, I picked up one of your propagation tips last year and finally got a viable pup, which felt like a small victory after years of overwatering. Do you find the gel quality differs much depending on light conditions, or is that more about leaf plumpness?
I've been wanting to try aloe vera indoors for a while now, so this is perfect timing. I'm still figuring out the balance with succulents—I tend to overwater everything—so I'm curious whether the "lean watering" approach means waiting until the soil is completely dry, or if there's a middle ground I'm missing? I have one small aloe in a pot that's been okay for about three months, and I'd love to share a photo to check if it looks as healthy as it should be for that age.
I've kept aloe for years and the one thing that actually changed my success rate was switching to a terracotta pot—drains fast enough that even if I forget to water for weeks, the roots don't rot. The gel harvest tip matters too; I used to strip whole leaves and waste half the plant, but taking just what I need from outer leaves has made mine much fuller over time. Did you find a particular soil mix works better than others, or is the standard cactus soil reliable enough?
I'd second the terracotta choice—the evaporative cooling and air exchange really do make a difference, especially if you're not meticulous about watering schedules. On soil, I've found standard cactus mixes serviceable, but I lean toward adding extra perlite or coarse sand to mine since *Aloe barbadensis* in particular seems to prefer that slightly sharper drainage; the standard stuff can hold moisture longer than ideal for succulents in temperate climates where humidity tends higher indoors.
I appreciate how you've emphasized the lean watering approach—that's where so many people stumble with succulents. My collection leans heavily toward orchids, so I don't have much hands-on experience with Aloe barbadensis, but I've always admired how forgiving it is compared to the fussy Phalaenopsis I fuss over in my arid climate. The practical harvesting details sound really helpful for someone actually using the gel rather than just growing for looks. Have you found certain leaf sizes work better for propagation than others?
I appreciate the practical angle here—aloe's honestly one of the easiest wins for beginners, though I do think most people underwater *way* less than they think they should once the plant's established. Mine sits in a bright west-facing window and I water pretty generously during the growing season, which seems counterintuitive for a succulent but mine's thriving. Have you found that the soil mix makes a big difference in how forgiving the plant is, or does aloe bounce back pretty easily regardless?
I've got three plants right now and I'm kicking myself for not grabbing an aloe sooner—sounds like it's way more forgiving than my orchid, which constantly has me second-guessing the watering schedule. Does the "lean watering" advice mean I should basically let it dry out completely between waterings, or is there a middle ground? I'd love to try propagating one too if I ever get my hands on a mature plant.
I'd say lean watering for aloe is genuinely more forgiving than what orchids demand—my *Phalaenopsis* has definitely kept me humble! With aloe, I let the soil dry completely between waterings (I'm talking bone-dry), then soak it thoroughly; that middle ground approach tends to invite rot. For propagation, just let any offset sit out for a day or two to callus over before potting it up—hard to mess that part up, honestly.
I've got a small collection of *Aloe barbadensis* here in a mediterranean setup, and the key difference I've noticed is that most people overwater thinking they're being helpful—the gel actually concentrates better when the plant experiences mild drought stress between waterings. If I had a photo to share, you'd see mine are distinctly plumper during our dry summers. Propagation from pups is straightforward if you let the cut callus over for a few days first, which saves a lot of rot headaches.
I'd gently push back on "rewarding" being quite so straightforward indoors—aloe really needs that intense, unfiltered light to stay compact and healthy, and most indoor setups leave them stretching leggy within a season. I've found they thrive much better in my Mediterranean climate on a bright south-facing balcony than anywhere inside, even by a window. That said, your point on lean watering is spot-on; that's where most people actually fail with them.
I'm with you on that—I kept my aloe indoors for two years thinking a south window would cut it, and it just got worse. Moved it outside to my Mediterranean balcony and it transformed within weeks, stayed compact and actually produced usable gel instead of that watery stuff. The lean watering part people do get right more often, but yeah, the light is the real make-or-break factor most guides gloss over.
I've killed exactly two aloe plants by loving them too much with water, so I'm really grateful for guides like this that hammer home the "lean watering" part—it's genuinely the difference maker. Mine sits in a bright north-facing window in my apartment (which definitely limits my tropical options), and it's somehow my most forgiving plant. Have you found that aloe propagation from pups is more reliable than other succulents, or is it pretty much the same ballgame?
I'd actually push back a bit on "rewarding" – aloe's more forgiving than rewarding in my experience. It'll happily sit neglected in a corner, but I've found the gel quality really depends on consistent bright light and proper drainage; mine got leggy and thin when I first grew it indoors without enough light. That said, the propagation bit is genuinely useful – leaf cuttings are practically foolproof if you let them callus first, so it's a great plant for passing along to friends.
I've learned the hard way that aloe really does need that bright light—mine got lanky and pale in a corner, and it wasn't until I moved it to a south-facing window that it actually started filling out again. The gel from a healthy plant is so much more potent too, which makes all the difference when you actually want to use it.
I've killed so many aloe plants by overwatering before I realized they basically thrive on neglect! Mine now lives in a sunny corner of my kitchen and I barely touch it except to harvest gel for minor burns. The propagation tip is gold too—I've got way more aloe pups than I know what to do with at this point. Do you find the gel works better fresh-harvested versus storing it in the fridge?
I've kept aloe vera (Aloe barbadensis) for a few years now, though I'll admit it took me longer than expected to stop overwatering—cold climates can make that tricky since growth slows so much in winter. The gel harvest part is what really won me over; I use it for minor burns in the kitchen. Do you have a preference between propagating from pups versus leaf cuttings, or have you found one method reliably works better in most conditions?
I've found aloe to be such a forgiving plant, though I had to learn the hard way that my arid climate means I underwater far less than most guides suggest. The gel harvest tip is what sold me on keeping one—I actually use it rather than just admiring it. Did you find that leaf size or gel quantity improved noticeably once you nailed the watering schedule for your specific conditions?
I totally get that—my aloe sits in the same arid climate and I was definitely overwatering at first, thinking I wasn't doing enough! Once I backed off, the leaves got so much plumper and the gel actually became useful instead of watery. I'd share a photo of my current one if I could upload here, but it's honestly night and day from when I first got it. The practical payoff really is the best motivation to dial in the care.
I keep three Aloe barbadensis clones and honestly the biggest shift for me was stopping the urge to water them—I went from weekly watering to maybe once a month in winter, nothing in summer unless the soil is bone dry. The gel yield improved noticeably once I dialed back the moisture. Did you find a particular soil mix worked better than others, or do you just use standard cactus potting mix?
I've had aloe vera in my collection for years and honestly it's one of the easiest wins—though I'll admit I killed my first one by overwatering when I was starting out! The gel extraction part is what really got me hooked though; there's something satisfying about having a plant that's genuinely useful beyond just looking nice. Do you find that leaf size tends to vary much depending on how bright the light is, or is it mostly consistent once the plant's established?
I've killed more aloe veras through kindness (read: overwatering) than I'd like to admit, so I'm grateful for the emphasis on lean watering. My turning point was repotting into a gritty cactus mix and only watering when the soil was bone dry—now my aloe actually produces enough gel to be useful rather than just sitting there looking slightly guilty. The propagation tip will be handy too, since my original plant's finally big enough to share pups with friends.
I've had mixed luck with aloe indoors, honestly—mine tends to get leggy in my cold climate even with a south-facing window. I'm curious whether you recommend repotting into terracotta specifically, or if drainage hole size matters more than the pot material itself? I've only got five plants total so I'm pretty deliberate about setup, and I'd love to dial this in before the growing season really kicks off.
I'd skip aloe if I lived somewhere cold—mine barely survived my winters and I ended up losing it. That said, the watering advice here is spot on; I see so many people kill them with kindness. My orchids actually appreciate the same lean approach, which is why I've stuck with those instead of restocking succulents. If you're in a warm climate though, aloe's pretty hard to mess up once you nail the drainage.
I'd push back slightly on "rewarding bright light"—mine (Aloe barbadensis) actually got sunburned on my south-facing sill during peak summer, which was surprising since I figured it craved light. Now I give it bright indirect, and the leaves stay plumper. The lean watering part is spot-on though; that's where most people stumble by fussing too much.
I've had my aloe for two years now, and the biggest mistake I made early on was watering it like my tropical plants back home—it hated that. Once I switched to barely watering it and let the soil dry out completely between sessions, the leaves got so much plumper. The gel inside is genuinely useful too, which makes keeping it feel practical rather than just decorative.
I've kept aloe for a few years now, and honestly the biggest game-changer for me in a cold climate was realizing I barely need to water it at all during winter—I went from constantly checking on mine to watering maybe once every 6-8 weeks, and it's thriving way more now. Do you find that most people overwater these, or is that just my experience? I'm curious how you handle watering schedules seasonally since I imagine it varies so much depending on where someone lives.
I kept killing aloe by watering it like my tropical plants—turns out the "lean watering" approach really does make all the difference! I'm curious whether you've found that propagating from pups works better in warmer months, or if timing matters less in a controlled indoor setup?
Yeah, I totally get that—I used to overwater mine too! I'm still pretty new to succulents (only got my first aloe last year), so I'm curious about the pup timing question too. Do you find yours propagates faster in warmer months even indoors, or has it been pretty consistent for you year-round?
I've had decent success with aloe in my mediterranean climate, but I'd actually push back a bit on "rewarding bright light"—mine thrives in dappled afternoon sun rather than full blast, and the few I've kept in direct south-facing windows got a bit stressed and pale. I'm curious whether your experience differs, or if indoor aloe just tolerates full light better than outdoor plants? Also, "lean watering" can be tricky to define—I've found the soil type matters way more than people realize.
I totally agree on the light—mine got that same pale, stressed look in a south-facing window, and it perked up once I moved it back. I think the difference is that intense outdoor sun is relentless, whereas indoor bright light (even from a window) is filtered and less likely to scorch. And you're spot on about soil mattering more than watering schedules. I switched to a gritty cactus mix and could actually water on a loose routine instead of obsessing over it; the drainage does the real work.
I've kept aloe for years but only recently realized how much the soil mix matters—mine was getting mushy until I switched to cactus mix with extra perlite. Do you find that most people underwater or overwater theirs? I'm curious whether you recommend starting propagation from pups or leaf cuttings, since I've had mixed results with leaves but pups seem foolproof.
I've had better luck with aloe in my arid climate than I ever did with my orchids—it's refreshing to grow something that actually *wants* neglect. That said, I'd love to hear more about your approach to propagation, especially whether you've found success with leaf cuttings versus offsets. Do you notice any difference in vigor between the two methods?
I'd push back slightly on the "indoors" angle—mine thrives in a bright Mediterranean spot outdoors and honestly gets leggy if I keep it inside year-round, even near a window. The gel production really does spike with full sun exposure. That said, your point on lean watering is spot-on; I've seen more aloe killed by kindness (overwatering) than anything else. Did you find a particular soil mix worked best, or does it mainly just need excellent drainage?
I've had my aloe for about four years now and honestly never realized how much the gel could do until I started actually using it—totally changed my perspective on keeping it as just a houseplant! My main struggle has always been resisting the urge to water too much, especially since my place gets pretty humid in summer. Do you find that people tend to overwater aloe more often than underwater it, or is it pretty split? I've got a photo of mine right now that's looking particularly happy if you ever wanted to see what happens when you finally get the watering rhythm right!
I've killed more aloe than I'd like to admit by overthinking the watering—turns out "lean" really does mean *lean* in my arid climate! Now I let mine dry out completely between drinks and they're finally thriving alongside my 14 other plants (mostly orchids, which I've learned have wildly different thirst levels). I'd love to see your harvesting technique because I'm still nervous about taking gel without damaging the plant.
Ha, I totally get that—I've been there with overwatering mine too! The shift to "completely dry" really is the sweet spot, especially in temperate climates where it's easier to slip into habit-watering. I'm curious how you're managing that watering rhythm with orchids in the mix, since those two are basically on opposite ends of the spectrum. I'd actually love to see what harvesting technique the author recommends as well, since I've always just pinched off outer leaves and worried I was doing it wrong!
I've learned the hard way that aloe really does need that lean watering—I killed my first one by being too generous, even though succulents are supposed to be forgiving. The gritty soil mix makes all the difference in a cold climate like mine where humidity indoors tends to stay low anyway. Are you finding that propagation from pups works better than leaf cuttings in your experience, or does it depend more on the individual plant's vigor?
Pups are definitely more reliable for me—leaf cuttings feel like a gamble and often just rot before they callus over. In my mediterranean climate the low humidity actually helps, but I've found pups establish faster because they already have a root structure starting. That said, I've had the most success just letting them dry out completely between waterings, which your gritty soil setup should handle well. Do your pups usually come away with any roots already attached, or are you starting them from scratch?
I've had *Aloe barbadensis* in my collection for years, and the propagation advice is spot-on—I've found that letting leaf cuttings callus for a few days before potting makes all the difference in avoiding rot. The emphasis on lean watering really is the key; I nearly lost mine early on by treating it like a typical houseplant instead of respecting its xerophytic nature. This practical breakdown should help people avoid that mistake.
I've got an orchid that's been finicky with watering, so I'm curious if the same "less is more" approach would work for aloe since I'm definitely guilty of overwatering. Does aloe really need that little water even in temperate climates, or should I adjust based on how much light it gets indoors? I'd love to try propagating some too—I've only got three plants total so far and that seems like an easy way to expand without buying more.
I've got three aloe plants scattered around my place and they're honestly some of the lowest-maintenance things in my collection—though I'll admit I nearly killed my first one by overwatering when I was starting out. Are you finding that leaf gel quality improves with plant age, or does maturity not really matter for the practical uses? I'd love to see a photo of your setup if you've got a mature specimen, since mine are still pretty young and I'm curious about scaling up propagation.
I've killed more aloe plants than I'd like to admit by overwatering, so I really appreciate you emphasizing the lean watering approach—that's the lesson that stuck with me! My one tip: in a cold climate like mine, I keep mine on a south-facing shelf away from any drafts, and it's made such a difference. Are you finding that most people struggle more with watering frequency or with giving them enough light?
I'd gently push back on aloe as a "rewarding" indoor plant—it's more temperamental than it looks. The real challenge isn't the care itself, but that most indoor spaces lack the intense, consistent light *Aloe barbadensis* genuinely needs; I've found mine (three plants, all in a south-facing window) thrive only during summer months. The lean watering advice is sound, but I'd emphasize that indoor humidity and poor air circulation often tip it toward rot before underwatering becomes an issue. Worth mentioning alongside the propagation tips.
I've been curious about aloe vera for a while but always worried it would rot on me—I tend to overwater everything. Does the lean watering schedule mean I should let the soil dry out completely between waterings, or is there a safer middle ground for someone still getting the hang of succulents?
I'd say let the soil dry out *completely*—that's genuinely the safer approach for aloe, not the riskier one. Unlike some succulents that appreciate a light drink before full dryness, *Aloe barbadensis* is stubborn about rot and actually prefers the stress of drought to sitting damp. Since you know you tend to overwater, treating it as a "don't water until bone dry" plant might actually make it harder to mess up than trying to find a middle ground that doesn't really exist for this species.
I've had mixed results with aloe indoors—mine thrives on a south-facing shelf but got pretty leggy before I realized it needed *way* more light than I initially gave it. The gel harvest tip is great though; I've been using it for minor burns and my partner swears by it for skincare. Since you mentioned lean watering, how often are you watering yours during winter? I'm in a cold climate and I'm never quite sure if I'm being too cautious or not cautious enough that time of year.
I've had my aloe for two years now and it's honestly the easiest plant I own—I barely think about it. The one thing I learned the hard way is that it's better to underwater than overwater, especially in the tropical humidity where I live. I used to worry mine wasn't getting enough water until a leaf turned translucent and mushy, and that's when I realized less really is more with these.
I've killed two aloe veras before I realized they just need to dry out completely between waterings—I was treating them like normal houseplants. Now I keep mine in a terracotta pot with cactus soil and water maybe every three weeks, and the leaves are actually thick enough to harvest. The propagation tip would be useful for me since I've got a plant that's getting leggy and could use some pups started.
Terracotta and cactus soil is the right setup—that's what actually works instead of guessing. Three weeks sounds about right for tropical climates, though I'd add that leggy plants often respond better to propagating from offsets (the pups) than trying to rehab the mother plant itself. You'll get better, bushier results that way.
I've killed exactly two aloe plants through sheer enthusiasm with the watering can, so I appreciate the "lean watering" emphasis here—that's the lesson that finally stuck with me. My remaining succulent collection (yes, all three of my plants are orchids, I know I'm predictable) taught me that aloe really does thrive on neglect in arid climates, which makes it perfect for someone like me who forgets about watering until the guilt sets in.
I've been meaning to expand beyond my herbs into succulents, and aloe keeps coming up as the gateway plant—sounds like this guide might finally push me over the edge! Quick question though: does the gel quality differ much depending on light levels, or is it mostly about leaf plumpness? I'm curious whether my shadier windowsill would still produce usable harvest or if I'd need to hunt for brighter real estate on my shelf.
I've killed more aloe plants than I'd like to admit by overwatering, so I'm glad you emphasize the lean watering—that's really the crux of it. Mine thrived once I switched to gritty cactus mix and watered maybe once a month in winter. The only thing I'd add is that aloe can handle way less light than people think; mine sits in a bright indirect spot and the leaves stay fat without stretching. Have you found a difference in gel quality or quantity based on how much direct sun the plant gets?
I've been trying to dial in the watering schedule for my aloe—I keep second-guessing myself since it's so drought-tolerant. Do you find that the "lean watering" approach changes much between seasons, or is it pretty consistent year-round in a tropical climate like mine? I'd love to see your propagation method too; I have a photo of some pups forming on mine that I'd share if I could upload, and I'm curious whether leaf cuttings or offsets tend to establish faster.
I've had great success with aloe since switching to a cactus mix and basically neglecting it—the one time I gave mine regular water like my other plants, it nearly rotted on me. Now I just harvest the outer leaves when they're thick enough and let the pups take over, and it's honestly one of the easiest growers in my collection of fifteen.
I've got three Aloe barbadensis specimens at different maturity stages, and honestly the biggest lesson I learned was patience with watering—I nearly killed my first one with kindness. Once I stopped treating it like a typical houseplant and accepted that weeks between waterings was normal, the leaves thickened up noticeably and I finally had enough gel for actual use rather than just admiring them. The propagation tip is solid too; leaf cuttings took longer than I expected, but the success rate was worth the wait.
I've had my Aloe barbadensis for about eight months now, and I'm still figuring out the watering—I think I overwatered it early on and the leaves got a bit translucent. Since switching to a grittier soil mix (I added extra perlite), it's bounced back nicely. Quick question though: when you harvest leaves for the gel, do you remove whole outer leaves from the base, or can you just cut sections off the sides?
I appreciate the practical focus here, though I'd gently push back on "most rewarding indoors"—Aloe barbadensis really thrives when it gets *intense* light, and most indoor setups leave it stretching sadly. I've had better luck with it in a south-facing Mediterranean spot where it actually produces that plump, gel-rich growth the post describes. Are you finding your indoor specimens stay compact, or do you supplement with grow lights?
I totally hear you—mine stretched like crazy on a windowsill before I moved it outside to my patio. The intense desert sun here in Arizona is what really brings out that thick, gel-filled growth. I'm curious though, do you think the stretching is worth it if someone's in a cooler climate and can't replicate that Mediterranean intensity? I've wondered if a lean approach (less water, less fertilizer) might at least keep indoor plants from getting *too* leggy, even if they're not ideal.
I've had mixed results with aloe in my cold climate—they thrive indoors but hate any hint of humidity, which is tricky in winter when I'm heating my place. I'm curious whether you've found success propagating leaf cuttings versus waiting for pups, since that seems to be where people run into trouble. Also, does your harvesting method affect how quickly the plant replaces used leaves?
I've had an aloe for about six months now and it's honestly been my easiest succulent yet! I'm still figuring out the watering schedule though—mine seems to stay plump longer than I expected, so I've been worried I'm overwatering. Do you find that the soil drying out completely is really the best indicator, or are there other signs you watch for?
I've had great success with Aloe barbadensis in my collection by treating it almost like neglect—the key really is resisting the urge to water. Since you emphasize lean watering here, I'm curious what your experience has been with overwatering damage; I've found that even in my mediterranean climate, the biggest killer is soggy soil in winter. The propagation tips would be especially helpful for readers since those pups root so readily.
I'll skip aloe for now since my cold climate makes it tricky indoors, but I respect how low-maintenance it is. I'm curious whether your watering advice holds for someone like me who keeps orchids in consistently cool conditions—succulents get finicky when it stays chilly and humid, right? I'd rather focus on what thrives in my setup with my small collection, though I could see aloe working in a warmer room of the house.
I appreciate how you've emphasized the lean watering approach—I've found that *Aloe barbadensis* really suffers from the opposite problem more often than underwatering. My specimens thrive in a gritty mix with extra perlite, especially through winter when I cut watering to nearly nothing. The gel harvest timing is worth stressing too; I've had better results waiting until leaves are genuinely plump rather than harvesting prematurely.
Totally agree on the gritty mix—I actually amended mine with extra coarse sand and it made a huge difference in drainage. Your point about waiting for truly plump leaves before harvesting really resonates; I used to be impatient and ended up with thin gel that didn't have much substance. Do you find your winter dormancy approach (cutting water way back) also affects how quickly new offsets propagate, or does it mainly just protect the mature rosettes?
I've killed more aloe plants than I'd like to admit by overwatering in my cold climate—they really do need to dry out completely between waterings, way more than I initially thought. The gel harvesting tip is what finally got me to keep one alive; knowing I could actually use it made me stop fussing with the plant so much! Do you find that people struggle most with the watering or the light side of things?
I've kept aloe for years and agree it's low-maintenance, but I'd push back slightly on "rewarding bright light"—mine thrives on a north-facing shelf where it barely gets direct sun, while a friend's south-facing plant started splitting and collapsing from too much intensity. The lean watering part is spot on though; that's where most people fail. Did you find aloe propagation easier from offsets or from leaf cuttings in your experience?
You make a fair point about light—I've found the same thing in my arid climate, where afternoon intensity can really stress them. Mine do best with bright, indirect light rather than direct sun, especially in summer. Offsets have been more reliable for me than leaf cuttings, which seem to rot before they root in my dry air, but I'm curious if you've had better luck with leaves given your setup.
I've found aloe to be wonderfully forgiving indoors, though I'd gently push back on "lean watering"—in my experience, the real culprit for rot is drainage rather than frequency. I keep mine (Aloe barbadensis) in a gritty cactus mix and water whenever the soil is completely dry, which actually ends up being more often than people expect during the growing season. The gel quality really does improve with brighter light though, so that part rings true.
I've killed more aloe vera plants than I'd like to admit by overwatering, so I'm glad you're emphasizing the lean watering approach! My game-changer was switching to a terracotta pot with cactus soil—the drainage made all the difference in my cold climate where things dry out slower anyway. Do you have tips for getting the gel to actually stay plump, or is that mostly just about the watering and light?
I feel you on the overwatering thing—I've definitely drowned my share of succulents over the years! The terracotta + cactus soil combo is gold, especially in damp climates. For keeping the gel plump, I'd say it's honestly just those two things you nailed: consistent bright light and restraint with water. I have an orchid that I baby way more than my aloe, and the aloe rewards neglect better than anything else in my collection of 14. If I could upload a photo of mine right now, you'd see those leaves are almost translucent they're so full—and that's purely because I ignore it most of the time!
I've had good success with Aloe barbadensis in a gritty mix (I use 60% perlite, 40% coir), and the difference in leaf plumpness really shows when you get the watering rhythm right—mine goes 3–4 weeks between drinks in winter. What's your take on when the leaves are actually ready to harvest without stressing the plant, or do you just wait until they're well-established at the base?
I'd love to see your soil mix—aloe really does suffer in standard potting soil, and I've found the difference between "okay" and thriving plants comes down to drainage. Mine are in a gritty 60/40 cactus mix to perlite blend, and they've never been happier. That said, I'm curious whether you recommend harvesting from mature outer leaves or if you've had success with the approach some people use of taking whole rosettes. I've only got four plants total, so I'm cautious about stripping them too aggressively.
I'd agree that aloe responds well to neglect, but I've found the soil part makes or break it—standard indoor potting mix holds too much water for the Mediterranean climate I'm in, even with careful watering. Mixing in extra perlite or coarse sand really does matter if you're not in a naturally dry environment. Have you noticed whether readers struggle more with overwatering or with getting the soil composition right?
I'll be honest—I killed my first aloe by watering it like I cared, which taught me that "lean" really means *lean*. Now I've got three thriving rosettes (though calling them native to my zone 4 garden would be pure fantasy), and the biggest revelation was switching to a gritty cactus mix with extra perlite. The gel harvest tip is especially helpful because so many people don't realize you can just snap a leaf and use it immediately rather than waiting for some elaborate processing.
I've had great results with Aloe barbadensis over the years, though I'd gently push back on the "lean watering" advice—mine thrives on what I'd call *sparse* watering, especially in winter when it barely needs anything. The gel content actually seems richer when I let the soil dry out completely between waterings. Looking forward to seeing your propagation tips, since leaf propagation can be tricky and I'm always curious how others approach it.
I've been wanting to try aloe vera since I keep reading about how useful it is, but I'm worried about the watering schedule in my cold climate—does it need even less water in winter when my house is cooler, or should I treat it the same year-round?
I appreciate the focus on lean watering—that's where most people kill aloe. I've got one that's been going strong for years in a terracotta pot with cactus mix, and the difference in leaf plumpness when you actually let it dry out completely is night and day. The gel harvesting tip is useful too, though I'd add that smaller leaves near the base are way less painful to work with than reaching for the big outer ones. Have a photo of mine that's put out three decent pups this year alone.
I've got a single Aloe barbadensis that's been my workhorse for years—honestly, it's hard to kill once you nail the watering schedule. My one question: do you find that the gel quality varies much depending on light conditions? Mine sits in a south-facing window and the leaves feel noticeably thicker than when it was more shaded, but I'm curious if that's just me or if you've noticed the same thing with your plants.
I'd gently push back on aloe being "rewarding" in the indoor setting—at least in my temperate climate, it's genuinely finicky without a south-facing window and even then prone to etiolation. I've had better success treating it as a seasonal plant that goes outdoors in summer rather than a year-round houseplant. The gel extraction is handy, though, so it's worth the fuss if someone's willing to provide that bright light consistently.
I've been growing aloe for years and honestly the biggest game-changer for me was switching to a terra cotta pot—in my cold climate, it helps prevent overwatering since the soil dries out faster. Have you found that certain pot materials work better in your area, or does it mainly depend on how often someone waters?
I've been trying to get my aloe (Aloe barbadensis, I think?) to thrive for about six months now, and I'm realizing I've probably been watering it too much—the leaves feel a bit soft lately. Your point about lean watering really resonates with me, so I'm curious whether you'd recommend letting the soil dry out completely between waterings, or just mostly dry? Also, I'm wondering if there's a noticeable difference in gel quality between a plant that's been well-cared-for versus one that's struggling, since I'd like to try using some eventually.
I've made the same mistake—aloe can be so forgiving that you don't realize you're overdoing it until the leaves get that mushy feeling! I let mine dry out *completely* between waterings (I'm talking bone dry, sometimes I wait an extra week), and it's made a huge difference. As for the gel, I haven't harvested much yet since I only have nine plants and I'm still learning, but I'd imagine a stressed aloe produces less gel or thinner stuff, so getting yours back to happy would probably help with that too!
I've had mixed results with aloe—my first one rotted despite following the "lean watering" advice, probably because I used regular potting soil instead of cactus mix. Now I keep mine in a gritty blend with extra perlite, and it's thriving in a south-facing window. The gel is genuinely useful for minor burns, which is why I'm glad I stuck with the species. Did you find a particular soil ratio works best, or does it depend more on your individual watering habits?
I'd honestly skip aloe if someone handed me one—succulents in general just aren't my thing in a cold climate, and I've never had the space to give them what they actually need. That said, your point about lean watering is spot on; most people kill these by overthinking it. I stick with orchids where I can control humidity better, and I've got my hands full with five of those already. If someone's determined to grow aloe indoors though, your soil and light guidance should work.
I hear you on the space constraint—five orchids is a serious commitment! That said, aloe really does slot into a different niche than your Phalaenopsis collection. It's more of a neglect-tolerant filler for a bright windowsill rather than something demanding regular attention, so it might actually free up energy rather than add to it. But you're right that cold climates make it trickier; I only manage mine because I have a south-facing spot that stays consistently above 10°C.
I've killed exactly two aloe veras before realizing I was drowning them with kindness (and water), so this is hitting me right where I need it! My current one finally has those satisfyingly plump leaves you mentioned, and I'm genuinely excited to try harvesting some gel. Quick question though—when you say "lean watering," are we talking once a month in my cold climate, or does it vary more than that? I'm still figuring out the watering rhythm for succulents in general.
I killed my first aloe through sheer kindness—watering it like I thought a plant *should* want water, which it absolutely did not. Now I've got three thriving in a sunny corner, and I actually use the gel for minor burns, which feels like I'm finally getting my money's worth out of a houseplant! Your point about lean watering really is the whole game with these.
I've had mixed results with *Aloe barbadensis* indoors—mine tends toward etiolation even with a south-facing window, so I've had better luck growing it in a bright, unobstructed spot outdoors here in the Mediterranean climate. Do you find the lean watering approach works the same year-round, or do you adjust seasonally? I'm curious whether your experience differs much if you're not in a particularly dry climate.
I've been curious about *Aloe barbadensis* for ages because I kept hearing about the gel uses, but I was always nervous about overwatering it indoors—do you find that most people kill theirs by watering too much, or is there usually another culprit? I'm in a temperate zone where humidity can get tricky, so I'd love to know if you have tips for preventing rot in less-than-ideal conditions!
Overwatering is definitely the main killer, but in temperate humidity you're actually fighting two things at once—wet soil *and* slow evaporation. I've found the best fix is aggressive drainage: I use a pot with plenty of holes, mix in extra perlite, and water only when the soil is completely dry, then wait another week. Since I'm tropical, I can get away with more casual watering, but your setup actually forces better habits. If you do end up with one, err on the side of dry and you'll do fine.
I've had my Aloe barbadensis thriving on a sunny shelf for years, and honestly it's one of the easiest plants to neglect successfully—which sounds backward but is exactly why I love it. The gel harvest is satisfying too, though I'm curious whether you've found a particular leaf size or age works best before cutting, or if you just go by feel?
I've been meaning to try aloe vera since I have a cold apartment and most of my collection—mostly orchids, actually—struggles with the low humidity here. Does aloe do well in cooler indoor temperatures, or does it really need warmth? I have nine plants total and they're all pretty finicky about their conditions, so I'm curious if aloe would be the easier option I'm looking for.
I've been meaning to get serious about my aloe for ages—it's been sitting in a corner looking a bit sad, so I'm curious whether moving it somewhere brighter would actually help it fill out the way you describe. One thing I'm still fuzzy on is whether the "lean watering" approach differs much from what I'm already doing with my other succulents, or if aloe really does need something special. Thanks for breaking down the practical side of this.
I appreciate how you've emphasized the lean watering approach—that's where most people stumble with succulents, especially in humid climates. I keep just two plants in my collection and they're both orchids, so I'm definitely outside my comfort zone with aloe, but I've been curious about it for years since the gel actually has genuine uses beyond the hype. Do you find that the propagation success rate stays high if you're working in an arid environment, or does that actually make things easier compared to other regions?
I've been wanting to get Aloe barbadensis established in my tropical setup, so this is perfectly timed—I'm still figuring out whether the usual "neglect it and it'll thrive" advice actually works indoors where it's humid year-round. My main question is whether the lean watering schedule changes if you're in a consistently warm, moist climate, or if that actually risks rot even more? I'd love to see your thoughts on that, since most guides seem written for drier regions.
I've had my aloe in the same spot for three years now and honestly it's been the easiest plant I own—though I did kill my first one by watering it like my tomatoes! Out here in the Mediterranean climate, I barely water mine in winter, and it's just gotten more generous with the gel. Are you finding that indoor aloe grows slower than if it were outside, or is bright light enough to keep them really thriving indoors?
I've killed more Aloe vera plants than I'd like to admit by overwatering in the tropics—turns out high humidity works against you with these. The best shift for me was switching to a gritty cactus mix with extra perlite and watering only when the soil is completely bone dry, which honestly takes longer here. The gel quality is noticeably better on stressed plants too, so I've made peace with letting mine look a bit lean.
I've kept aloe for years and agree the light is non-negotiable—mine really sulked until I moved it to a south-facing window. One thing I'd add: the lean watering applies year-round here in the med climate, but I found even that's too much during winter dormancy. Are you suggesting the same schedule works regardless of season, or do you adjust?
I've been wanting to try growing aloe vera, but I'm worried about keeping it happy in my cold climate indoors. Do you find that they do okay with just a bright windowsill, or do they really need that intense direct sun you mentioned? I currently have four plants and they're all pretty low-maintenance, so the lean watering approach appeals to me.
I'd actually push back slightly on "most rewarding" — *Aloe barbadensis* can be finicky about drainage indoors, especially if you're in a humid climate like I am here on the Mediterranean coast. Mine took two seasons to stop sulking until I switched to a gritty mix with extra perlite. Are you finding it tolerates indoor humidity well, or do you mostly recommend it for drier homes? I'm curious whether your watering advice assumes year-round growth or if you factor in winter dormancy.
You're totally right about the humidity factor—I've got eleven plants going and my *Aloe barbadensis* definitely threw a fit when I first brought it in during a wetter season. The extra perlite move is solid; I ended up doing something similar once I realized my watering schedule was honestly too generous for indoor conditions. Do you find yours bounces back faster now in winter, or does it pretty much just sit dormant regardless of the gritty mix? I'd love to know if the Mediterranean humidity has settled down for you since the soil switch.
I appreciate the focus on lean watering here—it's a mistake I see so often, even with experienced growers. Aloe vera really thrives on neglect in the right conditions, which is probably why it's such a reliable houseplant. My only challenge is finding enough bright light in my arid climate setup, though I suspect that's more about my space than the plant itself. Did you find any particular grit amendment works best for the soil mix, or do you prefer a standard cactus formula?
I've had good results with standard cactus mix—honestly, the exact grit type matters less than just ensuring it drains fast enough that water doesn't sit. The bigger thing I noticed was that aloe actually prefers lean soil anyway, so adding extra perlite or coarse sand beyond what's already in a decent cactus formula can backfire by making it *too* inert. For the light situation, if your space is genuinely limited, aloe will stretch eventually, but I'd rather see slightly slower growth with compact leaves than push it under insufficient light and risk rot issues down the line.
I've had good luck mixing standard cactus soil with extra perlite—probably 60/40—since my aloe tends to sit in a shadier corner than it'd ideally prefer, and the extra drainage helps prevent that sneaky rot that creeps in when conditions aren't quite perfect. The grit amendment really does seem to matter more than the exact ratio, so I wouldn't stress too much about hitting it precisely!
I'd gently push back on aloe as a go-to indoor plant—it really thrives in arid climates and tends to struggle with indoor humidity and irregular light in temperate zones, even on a sunny windowsill. I've found *Aloe arborescens* more forgiving indoors than *Aloe barbadensis* (the common medicinal type), but honestly, if someone's looking for a reliable succulent with similar gel properties in my climate, *Euphorbia pulcherrima* cultivars worth considering for consistency. That said, your points on lean watering and well-draining soil are spot-on—that's where most indoor aloe failures happen.
I've killed more aloe plants than I'd like to admit by watering them too often, so I'm glad you're emphasizing the lean watering approach. My surviving aloe thrives on neglect in a bright window, and I've learned that well-draining soil makes all the difference—I use a cactus mix with extra perlite. It's such a practical plant to have around, especially in the kitchen when you need gel for a minor burn.
I appreciate the practical angle here, though I'll be honest—aloe's never really stuck with me the way my orchids have in this cold climate. That said, I did keep one going for a couple years before it got too leggy, and the lean watering approach definitely works if you resist the urge to fuss with it. My main takeaway was that "bright light" really means *bright*; mine struggled in anything less than a south-facing window. The gel harvesting bit is solid advice though, and I'd imagine for someone in a warmer zone this would be far less fiddly than my current collection of five needy plants.
I appreciate how much you emphasize the lean watering—I learned that lesson the hard way with my aloe collection out here in the desert, where I somehow still managed to overwater them! My orchids have made me paranoid about underwatering, so pivoting to succulents was humbling. The propagation tips sound solid; I'd love to see your setup if you have a photo, though I imagine it's far tidier than my current 14-plant situation.
I've kept aloe for years and the one thing that actually made the difference was switching to a much grittier soil mix—mine were sitting in standard potting soil and basically rotting in slow motion. Now I use a 2:1 ratio of cactus mix to perlite and they're genuinely thriving. The lean watering part is real though; I only water when the soil is bone dry and they're honestly happier for it. Did you find a particular soil ratio that worked best, or does it depend more on your local humidity?
I appreciate the practical focus here—aloe really does thrive on neglect in the right conditions. Since I grow mostly orchids in an arid climate, I don't keep many succulents, but this genus is one of the few I maintain alongside my Cattleyas and Phalaenopsis, mainly for that gel. Do you find that potting in pure inorganic media (like pumice or gritty mix) makes a real difference in your setup, or do you prefer adding some compost for nutrient content?
I've killed more aloe plants than I'd like to admit before learning that they genuinely want to be ignored—I was watering mine like a tropical houseplant instead of the desert dweller it is. Now I keep mine in the sunniest corner I have and barely touch the watering can, and the difference is night and day. Thanks for laying out the practical details on harvesting and propagation, since I'm always looking to expand my collection without buying more plants.
I've had great success with Aloe barbadensis in a gritty, fast-draining mix with plenty of perlite—it really does make all the difference when you're trying to avoid that soggy rot scenario. The gel harvest timing is something I wish I'd known earlier; waiting for those outer leaves to mature gives you so much more usable product. Are you finding the propagation easier from offsets or leaf cuttings in your experience?
I'm honestly curious about your watering schedule—I know Aloe barbadensis prefers to dry out completely between waterings, but how often do you find yourself actually watering indoors during winter? I've got just the one aloe in my collection and it's thriving, though I had to unlearn my herb-gardening instincts (very different from how thirsty my basil gets). Do you recommend the soak-and-dry method, or does misting work better for potted plants?
I've killed two aloe plants by overwatering before I learned they genuinely prefer neglect—mine thrives now in a gritty cactus mix with water maybe every 3-4 weeks. The gel harvest tip is solid; I'd add that older outer leaves actually give more usable gel than the new growth, which I learned the messy way.
I've killed more aloe vera plants than I'd like to admit by overwatering in my cold climate—the gel's useful, but the plant itself demands patience. Your point about lean watering is spot-on; I've found that letting mine dry out completely between waterings, then waiting another week or two, actually works better than any schedule. Since you're in a warmer region, I'm curious whether you water differently in winter, or does your climate make that less of a concern?
I've had my aloe (Aloe barbadensis) for about eight months now, and I'm still figuring out the watering schedule—I think I've been too generous despite knowing they prefer drier conditions. Do you have any tips on telling when the leaves are actually plump enough to harvest, or is it just a matter of waiting until they're noticeably thick? I'd love to see a close-up photo of yours at harvest time to compare with mine.
I've been growing aloe in my dry climate for a couple months now and finally got the watering right—turns out I was overwatering like crazy. Does the post cover how often you should actually water in arid areas, or is it more general? I'm curious if my schedule (maybe once every 3 weeks) is typical or if I should go even longer since I'm in the Southwest.
I've had good luck with aloe in my dry climate, though I'll admit it took me a while to stop overwatering—that's where most people stumble. The gel harvesting tip is something I wish I'd known earlier, since it really does change how you think about the plant beyond just keeping it alive. Are you finding that people are actually using the gel they harvest, or does it mostly sit in the fridge untouched.
I've found aloe thrives best in my arid climate with almost benign neglect—mine are in a gritty mix that's probably 40% perlite, which might sound excessive but honestly prevents the root rot I see so often. The gel harvest is satisfying, though I've noticed the leaves stay plumper and more productive when I resist the urge to harvest too frequently; giving them a proper growth cycle makes a real difference.
I appreciate that perlite ratio—I've learned the same lesson with my Aloe barbadensis after losing a couple to rot early on. The key seems to be that aloe really *does* prefer neglect in the tropical humidity where I live, so heavy drainage becomes non-negotiable. And you're absolutely right about harvest restraint; I used to strip leaves constantly and got mediocre gel production, but once I settled into harvesting just the outer mature leaves every few weeks, the whole plant got noticeably more vigorous.
I appreciate the practical focus here. That said, I'd gently push back on the "lean watering" framing—I've found Aloe barbadensis does best when you let the soil dry completely between waterings rather than staying perpetually lean. The difference is subtle but real, especially in arid climates where the air is already doing half the work. My collection of fifteen tends to sulk if they're chronically underwatered, which I think gets conflated with "succulents don't need much water." Great to see the propagation angle covered though—that's where most people trip up.
You're making an important distinction—there's a real difference between infrequent watering and perpetually moisture-stressed soil. I've noticed the same with my three specimens; they actually push new growth more aggressively after a thorough watering followed by a genuine dry-down, versus the stunted look they get when I'm too cautious. The air humidity angle you mention is spot-on too; in my temperate climate where humidity tends higher, I do water more conservatively than someone in a genuine desert setup would need to.
I love how practical aloe is—I've got a couple *Aloe barbadensis* specimens myself, and they're some of the lowest-maintenance plants in my collection, which is saying something given my tropical focus. The gel harvesting part is what really converts skeptics, I think; there's something satisfying about actually *using* what you grow. Do you find that the gel quality differs much depending on how mature the leaves are before you harvest?
I've had great success with aloe, though I'll admit I keep mine more for the practical side than aesthetics—the gel is genuinely useful for minor burns and dry skin. My one is thriving in a gritty succulent mix with perlite, and I barely water it (maybe every three weeks in my temperate climate). Are you finding that most people struggle more with overwatering, or is the light factor the bigger issue you see in your experience?
I'd actually push back slightly on aloe being beginner-friendly indoors—I've seen far more root rot failures than success stories, mostly because people water on a schedule rather than waiting for the soil to dry completely. That said, the propagation advice is solid; I've had better luck with leaf cuttings than waiting for pups.
I've been wanting to get my aloe situation sorted out because mine always seems to lean toward the window, and I'm wondering if that's a light issue or just normal. My collection is mostly echeveria and jade plants, but the aloe is the one I actually use the gel from, so I'd love to get it thriving better—does your guide say anything about staking or rotating them to keep them upright?
I've had great success with Aloe barbadensis in my collection, though I'll admit the hardest part is resisting the urge to overwater—the temptation to "help" a plant that thrives on neglect is real. I'm curious whether you've found any difference in gel quality or yield between plants grown in pure gritty mix versus those with a bit more organic matter mixed in, especially in a mediterranean climate where our summers can get quite hot.
I love this topic because I learned the hard way that aloe really does need that bright light—mine got leggy and sad in a corner before I moved it closer to my window. The gel harvesting tip is what makes it so satisfying to grow, honestly. It's practical in a way most houseplants aren't, and it seems like your guide actually explains the propagation part clearly, which I found confusing at first.
Oh, I totally feel that leggy aloe pain—mine did the same thing before I realized my "bright indirect light" corner was basically a cave! The window move made such a difference. And yes, the practical angle is what hooked me too; there's something oddly satisfying about snipping a leaf for a burn instead of just admiring the plant sitting there.
I've had mixed results with aloe indoors—mine did great until I kept fussing with the watering! Once I switched to a gritty cactus mix and let it dry out completely between waterings, the leaves got so much plumper. Are you finding aloe tends to be fussier about drainage than other succulents, or is it more about light levels where you are?
I really appreciate the practical angle here—though I'd gently push back on "most rewarding indoors" depending on where you are. Aloe barbadensis does need *a lot* of light to stay compact and productive, and I've found it gets leggy pretty quickly in anything less than a south-facing window. I'm in a Mediterranean climate so I mostly keep mine outdoors in summer, which honestly transforms how it grows. Do you find your indoor specimens stay true to form, or do you have to rotate them frequently?
I've been meaning to get better at succulents—my collection is mostly orchids, which are pretty finicky, so aloe feels like it should be easier! Do you find that the gel quality changes depending on light levels, or is that just something I've imagined? I'd love to try harvesting some if I can get mine to plump up like the ones in your photo.
I've had my Aloe barbadensis for about eight months now, and I'm finally getting the hang of not overwatering it—though I still worry I'm underwatering! Would you say the gel harvest method matters, or can you just break off a leaf whenever you need it without harming the plant's growth?
I've got three aloe plants right now and honestly I'm still figuring out the watering schedule—mine always seem either shriveled or mushy, never in between! Do you have any tips for knowing exactly when they need water, especially since I'm in the Southwest where everything dries out so fast anyway?
I've been wanting to try aloe vera for a while now, but I was worried about killing it since I'm still getting the hang of succulents. Your point about lean watering really helps—I think I've been overwatering my other plants. Since I'm in a cold climate, do you have any tips for keeping aloe happy indoors during winter, or should I just accept that it'll go dormant?
Aloe's pretty forgiving once you dial in the watering—I'd honestly say it's easier than most succulents! For winter in cold climates, I just let mine rest in a cooler spot (mine get maybe 50–55°F by a window) and water even less frequently. They do slow down, but I wouldn't call it full dormancy so much as just... chilling out. The key is making sure they've got bright light even when it's dim outside, which can be tricky. Do you have a south-facing window you could move it to, or are you thinking of using a grow light?
I've killed more aloe plants than I'd like to admit by overwatering them in my cold apartment—they really do prefer neglect! My breakthrough came when I switched to a terracotta pot with extra perlite mixed in, and now I actually have enough mature leaves to harvest gel without feeling guilty. Are you finding that people struggle more with the watering or the light side of things?
I've found that *Aloe barbadensis* thrives best when I resist the urge to water—my biggest mistake early on was treating it like a typical houseplant rather than respecting its xerophytic nature. The gel quality seems noticeably better when the plant stays on the drier side, and I'm curious whether you've observed differences in gel viscosity or potency between plants grown in truly minimal versus moderate moisture regimes?
I've killed more aloe vera plants than I'd like to admit by overwatering, so I'm glad you emphasize the lean approach—mine finally thrived once I switched to a gritty cactus mix and basically forgot about it. That said, I'm curious whether you've found aloe responds differently in cold climates; I'm in zone 4 and keep mine on a south-facing shelf year-round, but I wonder if dormancy in winter changes the watering frequency even further.
I've been wanting to try aloe vera for a while since I keep hearing about the gel uses, but I was worried it might be too tender for my cold climate indoors. Does it do okay as a year-round houseplant, or do I need to be extra careful about temperature during winter?
I've kept aloe for years and agree completely about the lean watering—that's where most people fail. One thing I'd push back on slightly: I've found mine does better with slightly grittier soil than standard succulent mix, especially in my humid mediterranean climate where rot creeps in otherwise. Have you run into drainage issues with your setup, or does standard cactus mix work fine in drier regions?
I'd totally agree on the grittier soil—I've added extra perlite and coarse sand to mine for years, honestly more out of paranoia than anything else given how wet my winters get here. The standard mix always felt risky to me, especially since aloe can sit in a pot for months between waterings. Do you amend it yourself or have you found a premixed blend that works well?
I've had *Aloe barbadensis* in my collection for years and honestly it's been one of the easiest—though I'll admit I killed my first one by overwatering! Are you finding that the gel yield gets noticeably better once the plants reach a certain maturity, or does leaf thickness plateau pretty early on?
I've kept *Aloe barbadensis* for a few years now, and the biggest game-changer for me was switching to cactus mix amended with extra perlite—standard potting soil holds too much moisture even for such a drought-tolerant plant. The lean watering approach is spot-on, but I'd emphasize that "lean" really means once a month or less in winter, since overwatering is genuinely the only way to kill these reliably.
I'm totally with you on the perlite amendment—I've got three aloe in my collection and they really do thrive with that extra drainage. I actually mix in a bit of coarse sand too, which seems to help with airflow around the roots. Have you found that the extra perlite makes a difference in how often you can get away with watering during the growing season, or do you still stick to a pretty rigid schedule year-round?
I'd skip the aloe recommendation for cold climates like mine—mine never thrive indoors without a heated grow shelf, and honestly, my orchids do better with less fussing. That said, if someone's in a warm spot, the lean watering advice here is solid. The propagation notes should work fine; I've had better luck with leaf cuttings left to callus for a week before soil contact than planting them straight in.
I've kept an aloe for years in my tropical setup, and honestly the biggest thing that changed my results was finally accepting it *hates* sitting wet. I switched to a pot with drainage holes on the sides (not just the bottom) and water only when the soil is completely dry—which in humidity like mine is maybe every three weeks. The leaves stay plump and the gel actually thickens up instead of getting thin and watery. I'd have a photo of mine to show the difference, but the practical takeaway is don't overthink it; just let the soil dry hard between waterings.
The side drainage holes are a great catch—I did the same thing after killing my first aloe by being too generous. In my mediterranean climate the soil dries fast enough that I'm watering maybe once a month now, but that wet-leaf problem you describe is exactly what I see when someone's kept theirs in a kitchen or bathroom. Have you found the leaf thickness makes a noticeable difference when you're actually harvesting gel, or is it mainly just a sign of healthier plants?
I killed my first aloe through sheer kindness (watering it like it actually wanted attention), so I'm thrilled to see this spelled out so clearly! The lean watering bit really is the secret—mine's finally thriving now that I've stopped fussing over it. I'd love to snap a photo of how plump the leaves have gotten, though my cold kitchen definitely keeps growth slower than I'd like. Really looking forward to trying the propagation tips since I'd like to eventually have more than just this one.
I've been wanting to try aloe vera since I live in Arizona and figured it'd be perfect for my collection, but I've killed two already by watering them too much! I'm really hoping your soil recommendations will help me get it right this time—do you have a preferred soil mix, or is standard cactus mix good enough? I'm excited to actually use the gel too, not just grow it.
Ah, you're in the perfect climate for it! Honestly, standard cactus mix works fine, but I'd lean toward cutting it with extra perlite or coarse sand—Aloe vera really hates sitting damp, even more than most succulents. Since you're in Arizona, the bigger win is probably letting the soil dry out completely between waterings, maybe even going longer than you think necessary. Are you planning to use the gel fresh, or were you thinking of storing it?
I've found *Aloe barbadensis* performs best when I lean even harder into neglect than most succulents—mine sits in a bright window and gets water maybe once monthly in the growing season. The gel quality really does seem tied to how stressed (in a good way) you keep the plant; my most vigorous specimen took three years of barely-touched conditions before it was worth harvesting from. One thing I'd add: the soil drainage matters far more than people think, so I always amend with extra perlite to prevent the slow rot that kills more aloe than underwatering ever will.
I've had great success with *Aloe barbadensis* in my Mediterranean setup, and I think you've nailed the most important point—so many people overwater and end up with mushy crowns. The lean watering approach really does make the difference between a struggling plant and one that produces that thick, gel-filled foliage. Have you found a particular soil amendment (beyond standard cactus mix) that works especially well for preventing root rot in more humid climates?
I totally agree about the overwatering trap—I've definitely lost a few to that myself! For humidity management, I've had the best results amending standard cactus mix with extra perlite and a bit of horticultural charcoal, especially since my temperate climate can get muggy in summer. Do you find *A. barbadensis* stays more compact in your Mediterranean setup, or does it still want to stretch toward light like mine tends to?
I've only got three plants to my name and exactly zero are aloe—clearly a gap I need to fix, since I'm always reaching for that gel and paying store prices for it! Your watering advice is especially useful; I tend to overwater everything out of anxiety, so the "let it dry completely" mantra is something I need tattooed on my forehead. Might finally give *Aloe barbadensis* a proper shot now.
I've got three Aloe barbadensis in my collection and they really do thrive on neglect. One thing I'd gently push back on though—I find the "lean watering" advice can sometimes get misinterpreted as "never water." Mine actually prefer a thorough soak when the soil dries out completely, rather than light, frequent misting. In my arid climate that means maybe once a month in summer, but the key is letting them dry between drinks. The gel quality seems noticeably better when they get proper hydration cycles rather than sitting bone dry.
I've got three aloe plants scattered around my Mediterranean garden, and honestly they've been some of my lowest-maintenance wins—though I did kill my first one by watering it like a regular houseplant! Now I just let them dry out completely between waterings and they're thriving. The gel extraction tip is helpful since I'm always running to mine when I get a small burn in the kitchen. Have you found one variety hardier than the others, or are they all pretty forgiving once you nail the watering schedule?
I've had *Aloe barbadensis* for three years now and it's honestly the lowest-maintenance plant in my collection—though I did learn the hard way that "lean watering" means winter dormancy, not just caution. My biggest win was switching to a gritty cactus mix with extra perlite, which completely stopped the root rot I kept getting with standard potting soil. Looking forward to seeing your propagation method since I've only had luck with pups that had developed their own roots before detaching.
I've had my aloe for three years now, and honestly the biggest game-changer for me was switching to a terracotta pot—I was overwatering like crazy in plastic because I couldn't tell when the soil had actually dried out. Since it's so dry where I live, I basically water mine every three weeks in winter and maybe twice a month in summer, but I'm curious how your watering schedule changes if you're in a more humid climate?
I've killed exactly one aloe in my thirteen-plant collection, and it was definitely through overwatering—I treated it like my other houseplants instead of trusting the "lean watering" approach. Now I keep mine in a bright window and barely touch the watering can, and it's rewarded me with those beautifully plump leaves you mentioned. Really useful to finally have a guide that spells out the propagation steps too!